Scheduling and managing client appointments
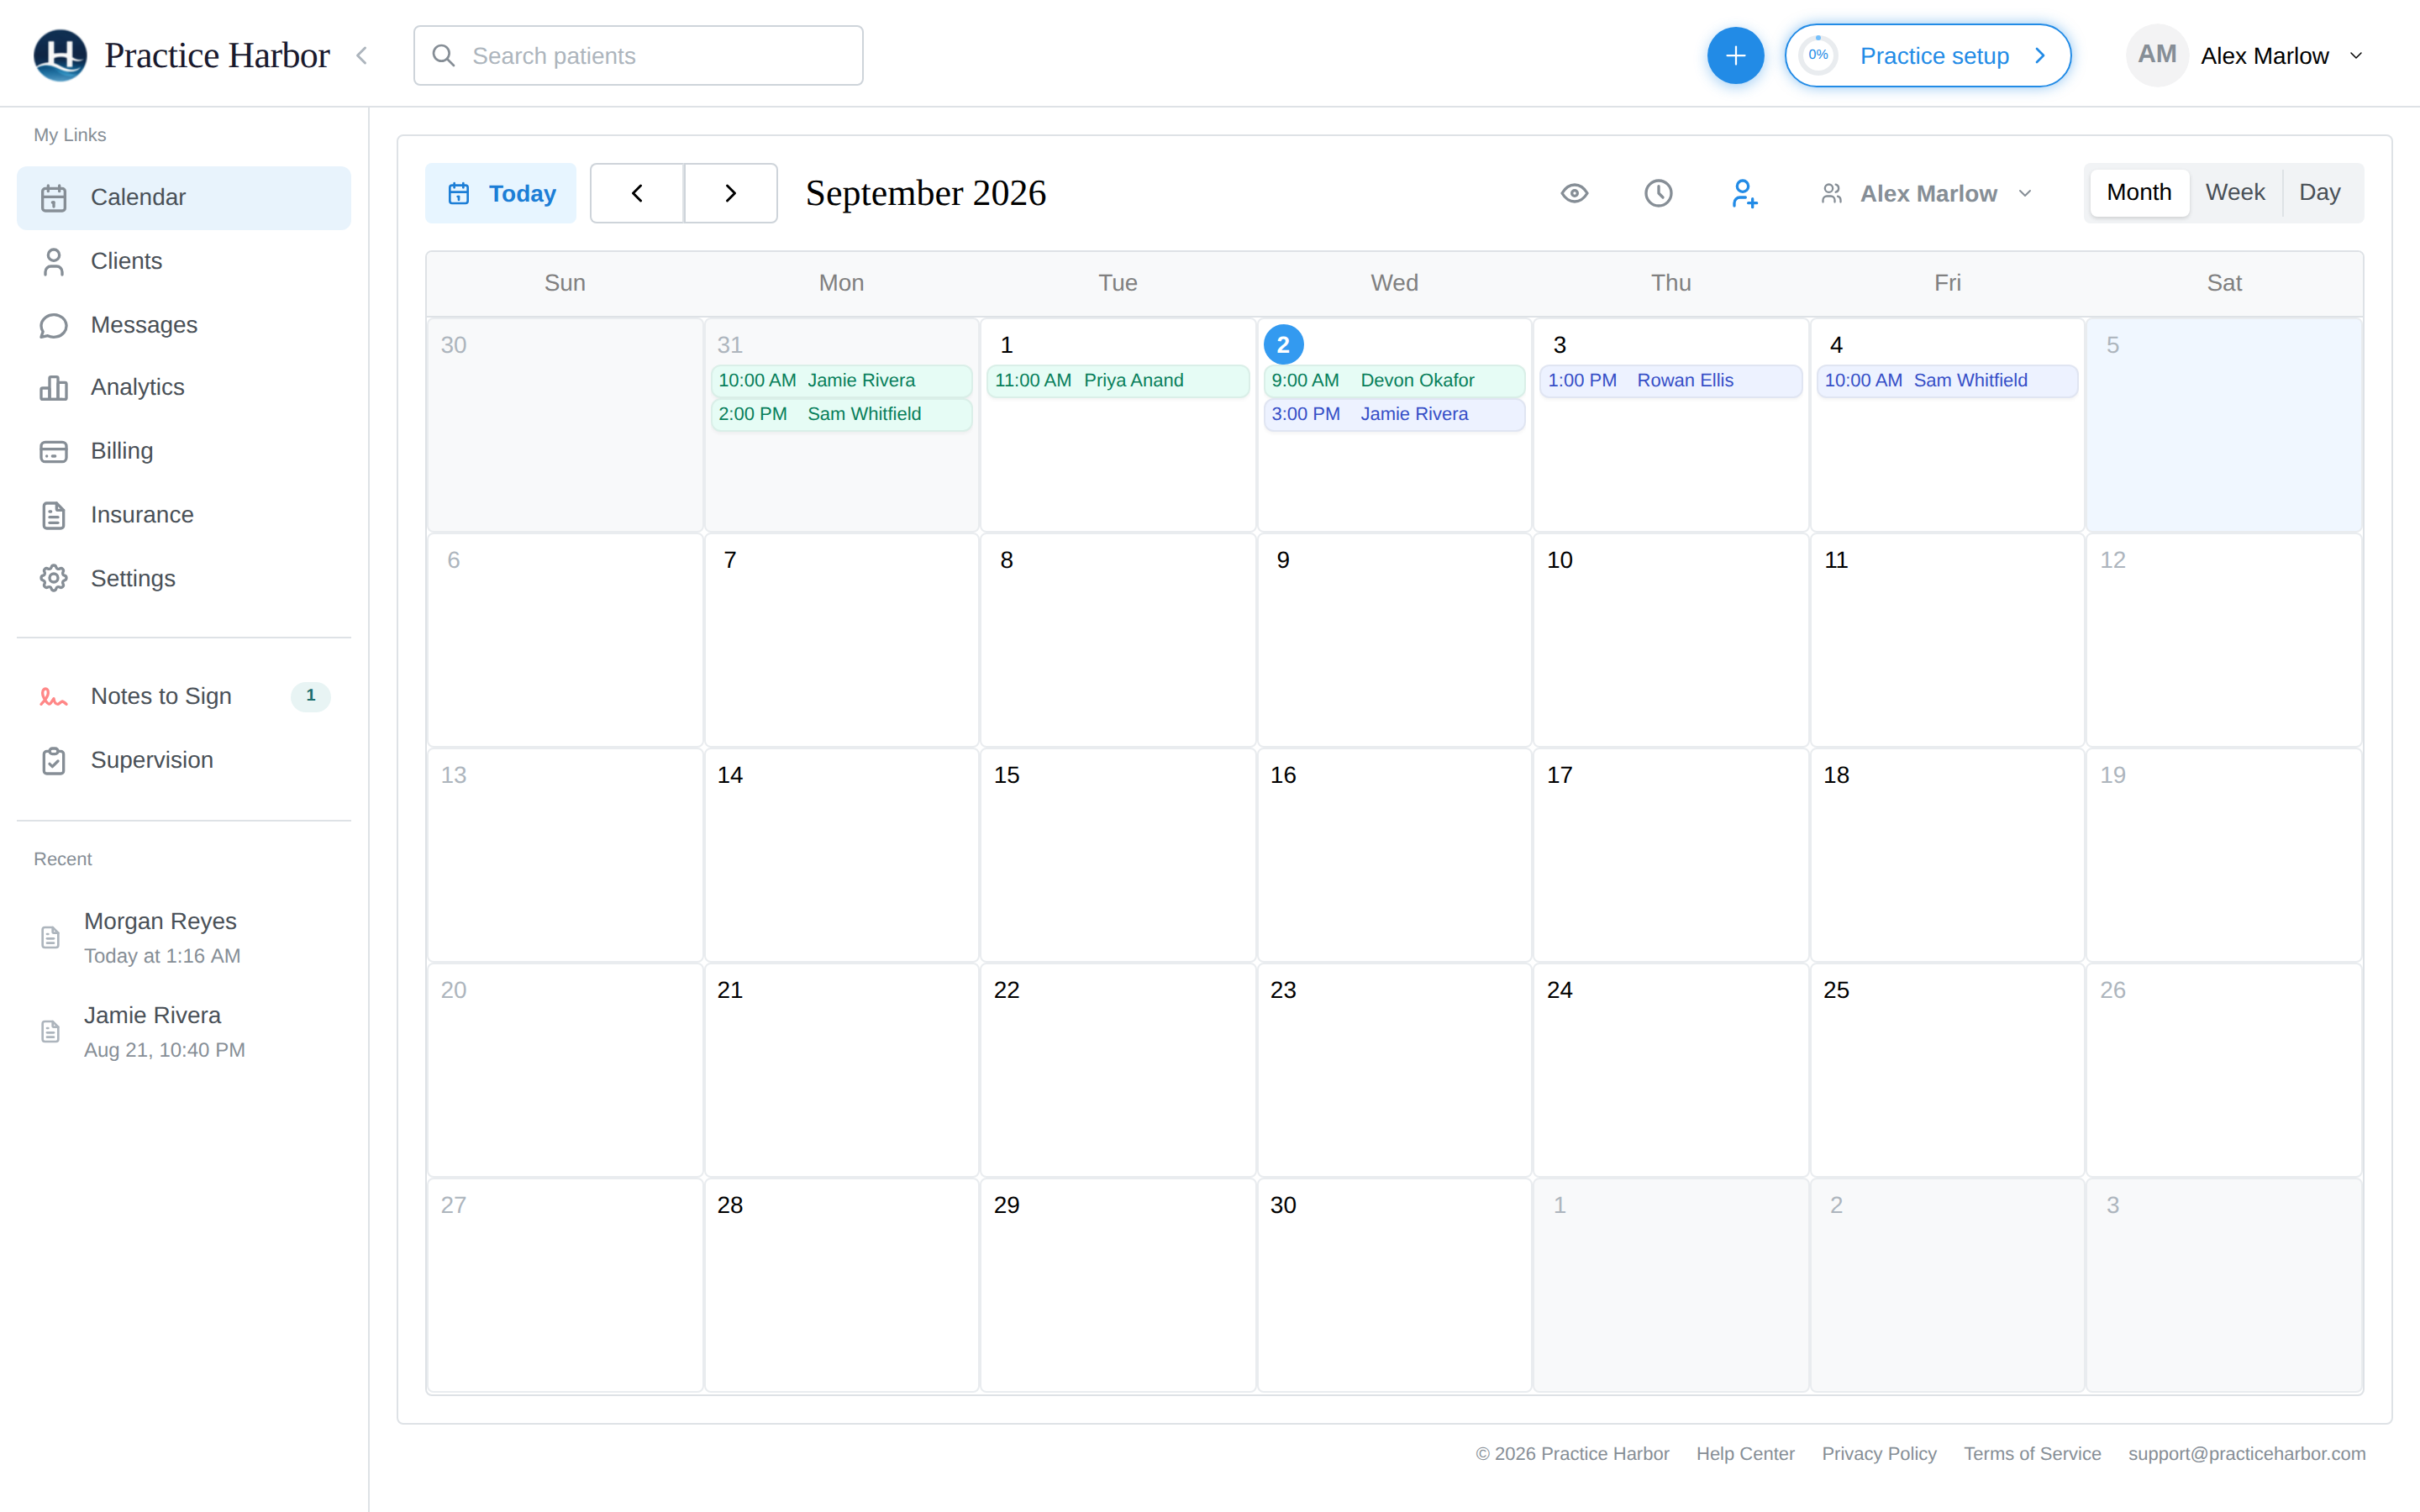
Your Calendar (left sidebar) is home base for the clinical week: create appointments, move them when plans change, mark what happened, and hand off to notes and billing.
In this guide, we'll cover:
- Creating an appointment
- Editing and rescheduling an appointment
- Marking what happened (statuses)
- Deleting an appointment
- Appointments you can't change (locked)
- Getting around the calendar
- Scheduling couples and families
Creating an appointment
- Navigate to your Calendar and click an empty time slot — in Week or Day view the appointment starts at the time you clicked. (You can also click the + button in the top bar and choose New Appointment.)
-
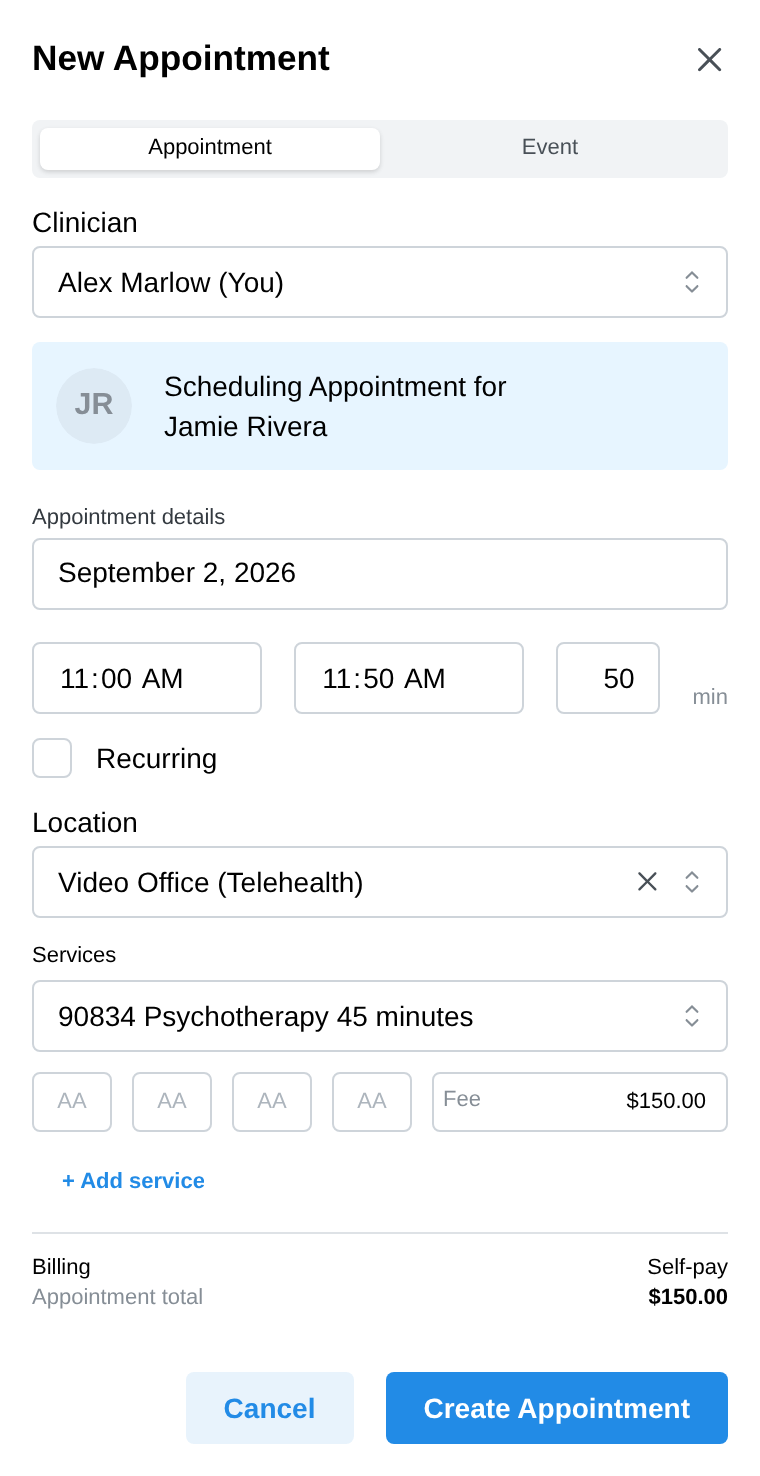
In the New Appointment panel, search for your client by name and select them. For couples or family sessions, pick the therapy group from the "Couples / Families / Groups" section of the results instead — see scheduling couples and families.
-
Set the date, start and end times — the duration (default 50 minutes) recalculates as you change the end time, and vice versa.
-
Pick a Location. Your client's usual location is preselected. Choosing your practice's virtual location is what makes it a telehealth appointment. For the built-in video location, the video-session button appears on the appointment afterward; sessions at an external-platform location (Zoom, Doxy, and the like) or a phone location happen there instead, so they don't get the button.
-
Review the Services section: the client's usual service code and fee are filled in from their billing defaults. Change the code, add up to four modifiers, adjust the fee, or click + Add service for a second line. The Billing summary below shows self-pay vs insurance and what the client will owe.
-
To make it a repeating session, tick Recurring and choose the cadence (every 1–8 weeks or months) and how many sessions to end after — the whole series is created at once. See Recurring appointments.
-
Click Create Appointment.
The calendar won't stop you from scheduling overlapping sessions — back-to-back and intentionally overlapping bookings are normal clinical practice. Online booking is where times are protected from clients double-booking you.
Editing and rescheduling an appointment
To reschedule, just drag: hover over the appointment and drag it to a new day or time — the duration comes along. (Synced Google Calendar events can't be dragged.)
To edit details:
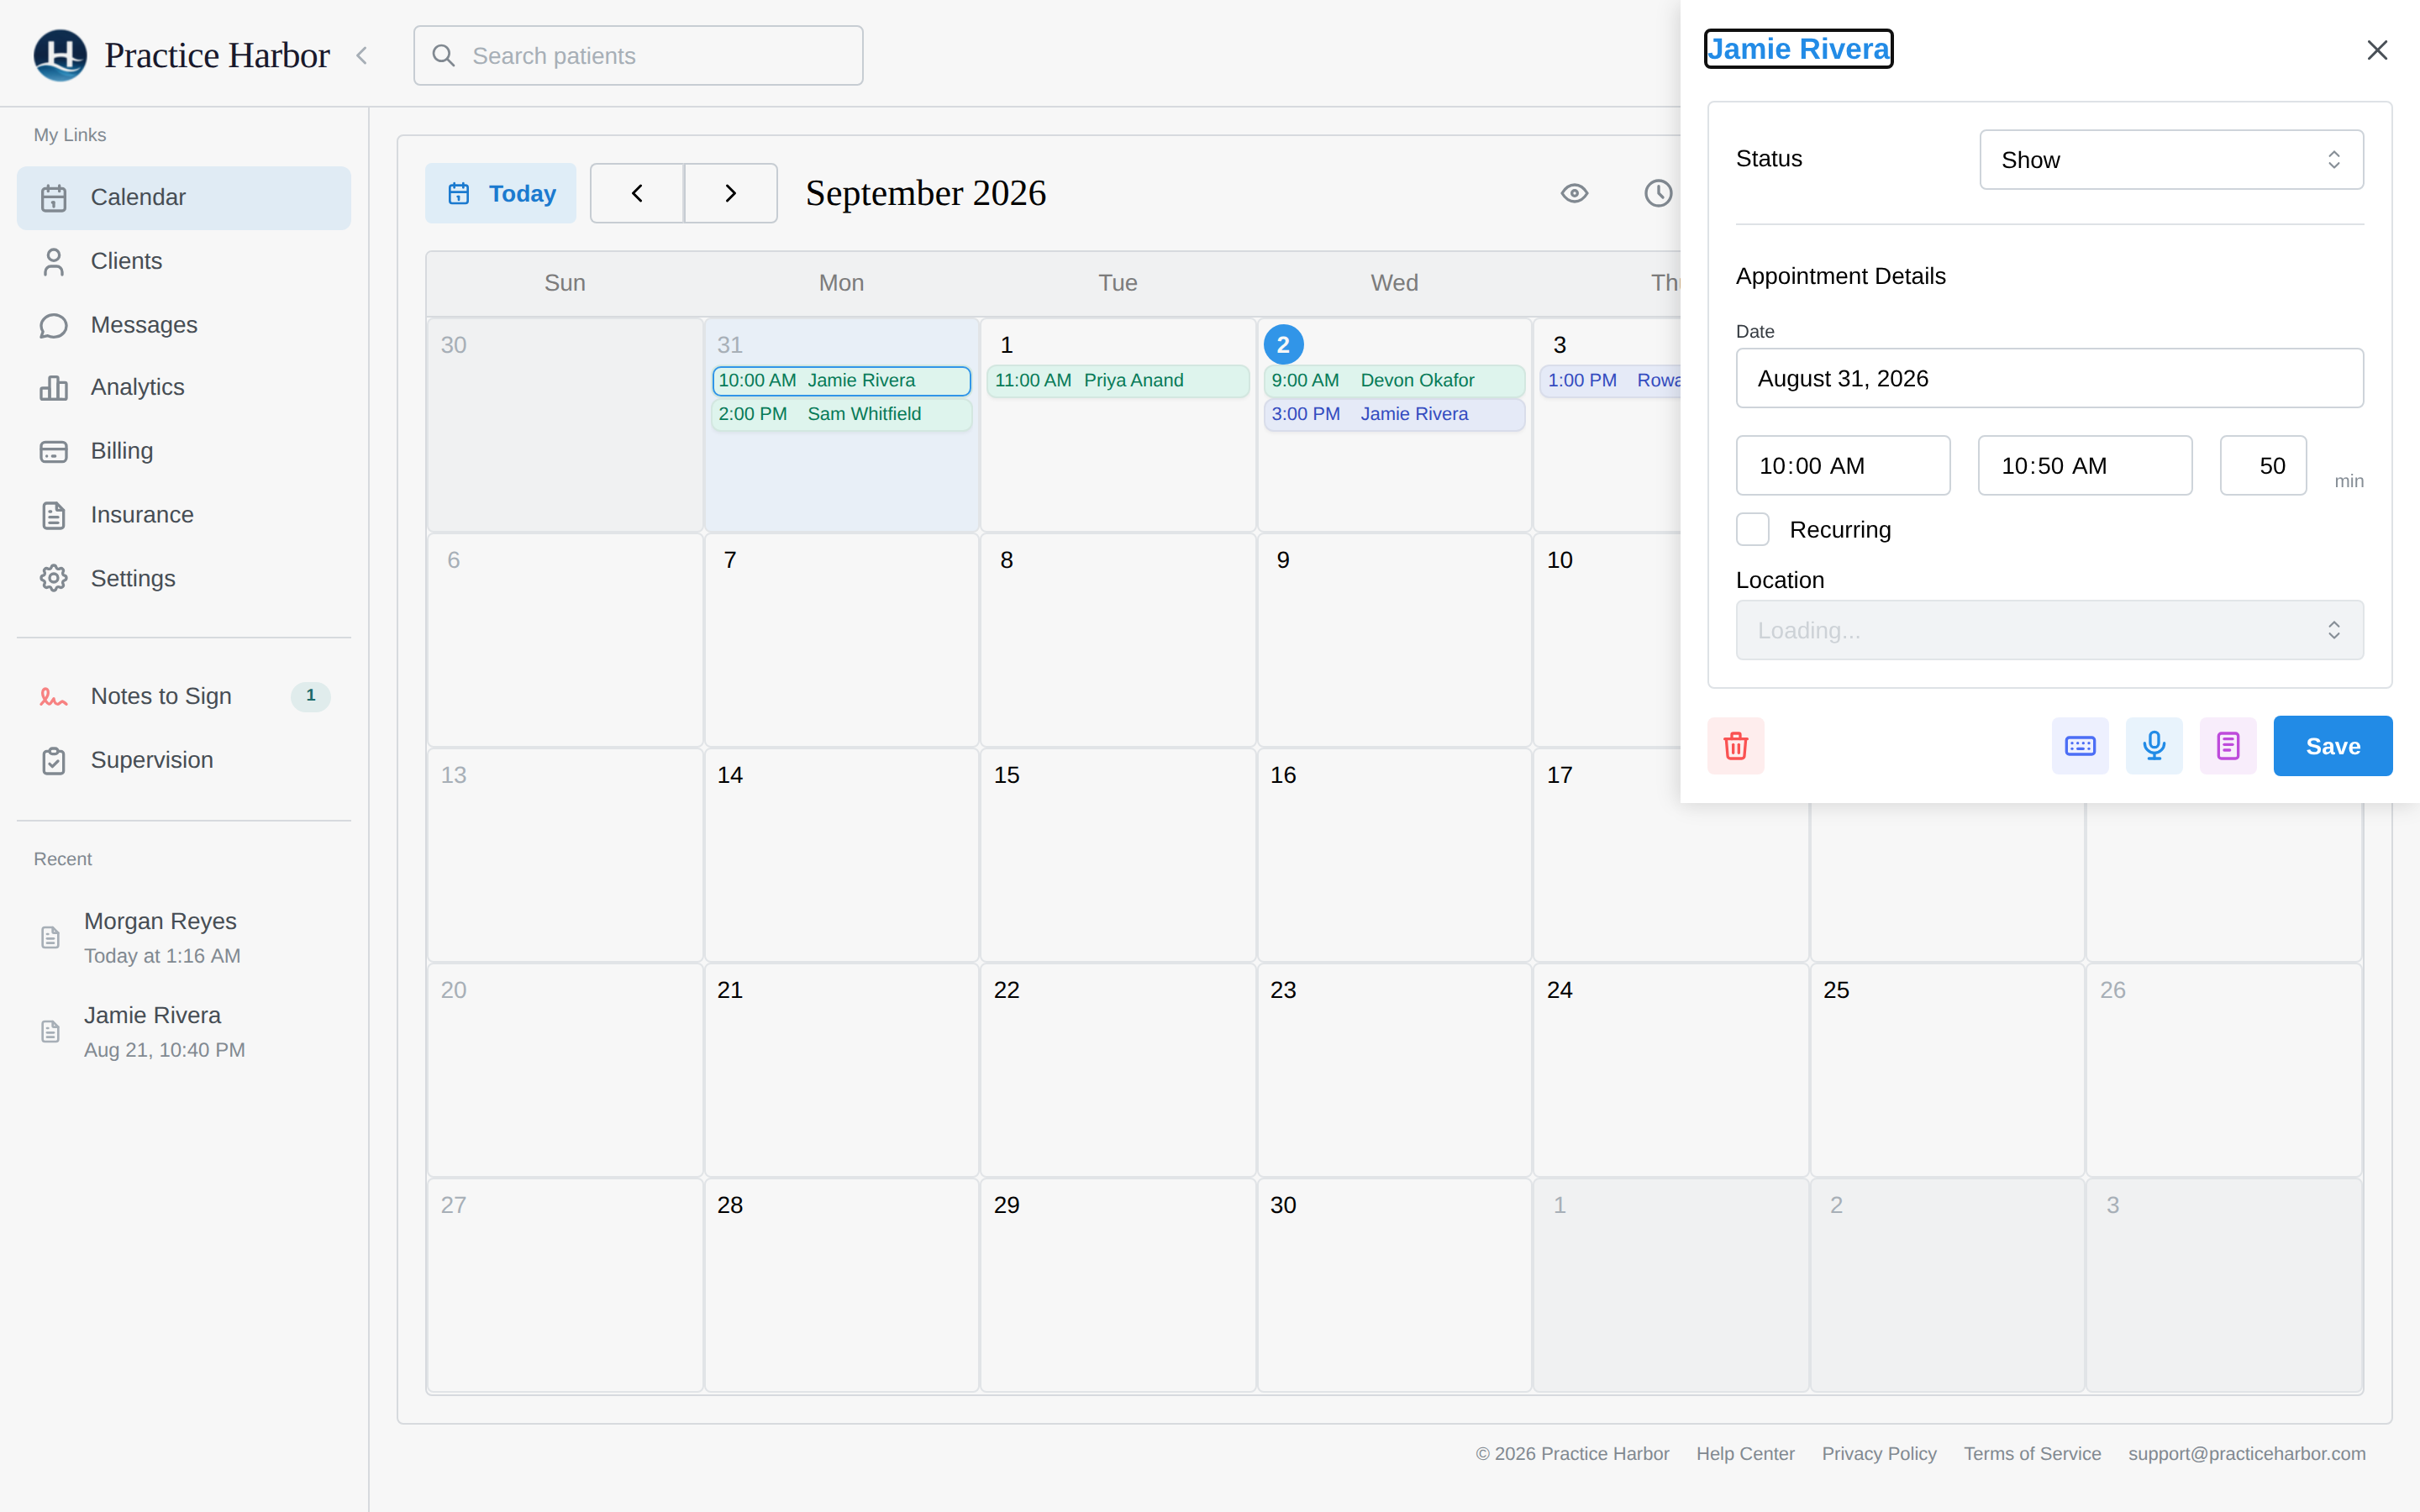
- Click the appointment — the details panel opens.
- Change the time, location, services, fees, or status directly in the panel.
- Click Save. If you close with unsaved edits, you'll be asked whether to Save Changes or Discard Changes.
If the appointment is part of a recurring series, you'll be asked how far the change should reach: Update only this appointment or Update this and future appointments. This covers the date and time as well as the service and fee; see Recurring appointments.
The details panel is also the launchpad for everything connected to the session:
- Video Session — joins the telehealth call (shown only for appointments at the practice's built-in video location)
- Record Session / Dictate Note — capture the session for an AI-drafted note
- Upload File — attach a document
- View note — jump to the progress note once one exists
- Create Invoice & Add Payment — bill the session
- + Add more — extend a recurring series by 1–12 sessions
Marking what happened (statuses)
Use the status dropdown at the top of the details panel, then Save:
- Booked — scheduled (upcoming appointments show indigo; past ones teal)
- Show — the session happened; its services become billable charges
- Cancelled, Late Cancelled, Clinician Cancelled, No Show — shown struck-through; the time is released back to online booking, the session's charges come off the books, and Late Cancelled / No Show open a fee panel so you can charge a cancellation fee in the same step. Clinician Cancelled is for when the practice cancels, and it can offer to message the client — see Cancellations, no-shows, and late-cancel fees
Moving a Show appointment back to another status after you've invoiced it is deliberately hard: you'll be asked to delete the invoice first ("Delete invoice to change appointment status"), and if a claim was already submitted you'll see a warning that it may need to be voided with the payer.
Clinicians edit their own calendars; practice managers and schedulers edit any calendar. Team members with the practice biller role can also open any appointment and change its time, status (including marking a no-show or late cancellation), services, and fees — scheduling new appointments stays with schedulers and managers. See Roles & permissions.
Deleting an appointment
- Click the appointment on your Calendar.
- Click the trash icon in the details panel's bottom row.
- Confirm — "Are you sure you want to delete this appointment? It will be permanently removed."
For a recurring series, you choose the scope instead: Delete Only This Appointment, Delete This and Future Appointments, or Delete All Appointments in Series.
Deletion can't be undone from the calendar. When deleting a series, sessions that already have a progress note are left in place rather than deleted.
Appointments you can't change (locked)
Documentation and billing lock an appointment down so the clinical and financial record stay consistent:
- On a superbill: the panel shows "This appointment is on a superbill and can't be edited or deleted. To make changes, delete the superbill in Billing Documents, then edit and recreate it." Do exactly that: delete the superbill, make your change, recreate the superbill.
- Has a progress note: the appointment can't be deleted. Delete the note first — and if the note is signed, unlock it before that (see Notes & signing).
- Invoiced: deleting the appointment (or reverting its Show status) first asks you to delete the invoice. Any payments on that invoice become unallocated so you can reallocate them.
Getting around the calendar
- Switch between Month, Week, and Day with the toggle at the top right — your choice is remembered. Today jumps back to the current date; the arrows step by day, week, or month.
- See a colleague's calendar: practice owners, managers, schedulers, and clinicians with full-caseload access get a team dropdown in the header for viewing other clinicians' schedules; the selection sticks between visits.
- Privacy: the Privacy off / Privacy on button beside the settings gear switches appointment tiles to initials and abbreviates event titles the same way — useful when sharing your screen. The label shows which state you're in. It's cosmetic (per device), not an access control.
- Requests: appointment requests from online booking and the client portal are reviewed on the Requests page in the left menu, which shows a count of pending ones. A pending request draws on the calendar as a provisional tile; clicking it opens the request.
Scheduling couples and families
- Create the appointment as usual.
- In the client search, select the therapy group (e.g. "Jamie & Karen") from the Couples / Families / Groups results.
- Everything else works the same — the appointment shows the group's name on the calendar, and billing follows the group's identified client and billing settings.
Therapy groups are created from the New Client drawer (not from a profile page) — see Couples & Family Therapy.
Appointment reminders
Email reminders go out automatically before each appointment (48 hours by default). Adjust timing and channels in Settings → Client Notifications — see Client notifications & reminders.