Adding and managing team members
You can add new team members to your practice at any time. Practice Harbor offers specialized team member roles with tailored access levels for clinicians and administrative staff.
Before adding or editing team members, see Roles & Permissions to learn what each role can see and do.
This guide covers how to add, update, and remove team members:
- Pricing for team member roles
- Adding a new team member
- Troubleshooting invitation emails
- Updating a team member's roles
- Removing a team member
Pricing for team member roles
Your subscription is based on the clinicians in your practice, not on features:
- Pre-licensed clinicians (associate-level licenses, interns, trainees) are always free.
- Additional licensed clinicians are $19/month each on the Established plan.
- Administrative roles — practice manager, practice biller, and practice scheduler — don't add anything to your subscription.
For the full model and worked examples, see Subscription & Pricing.
Adding a new team member
Only the practice owner (Clinician with entire practice access) or a Practice manager can add or manage team members. If the new member will work under supervision, make sure their supervisor already holds the Supervisor role first — otherwise they won't appear in the supervisor dropdown. See Supervision.
To add a team member:
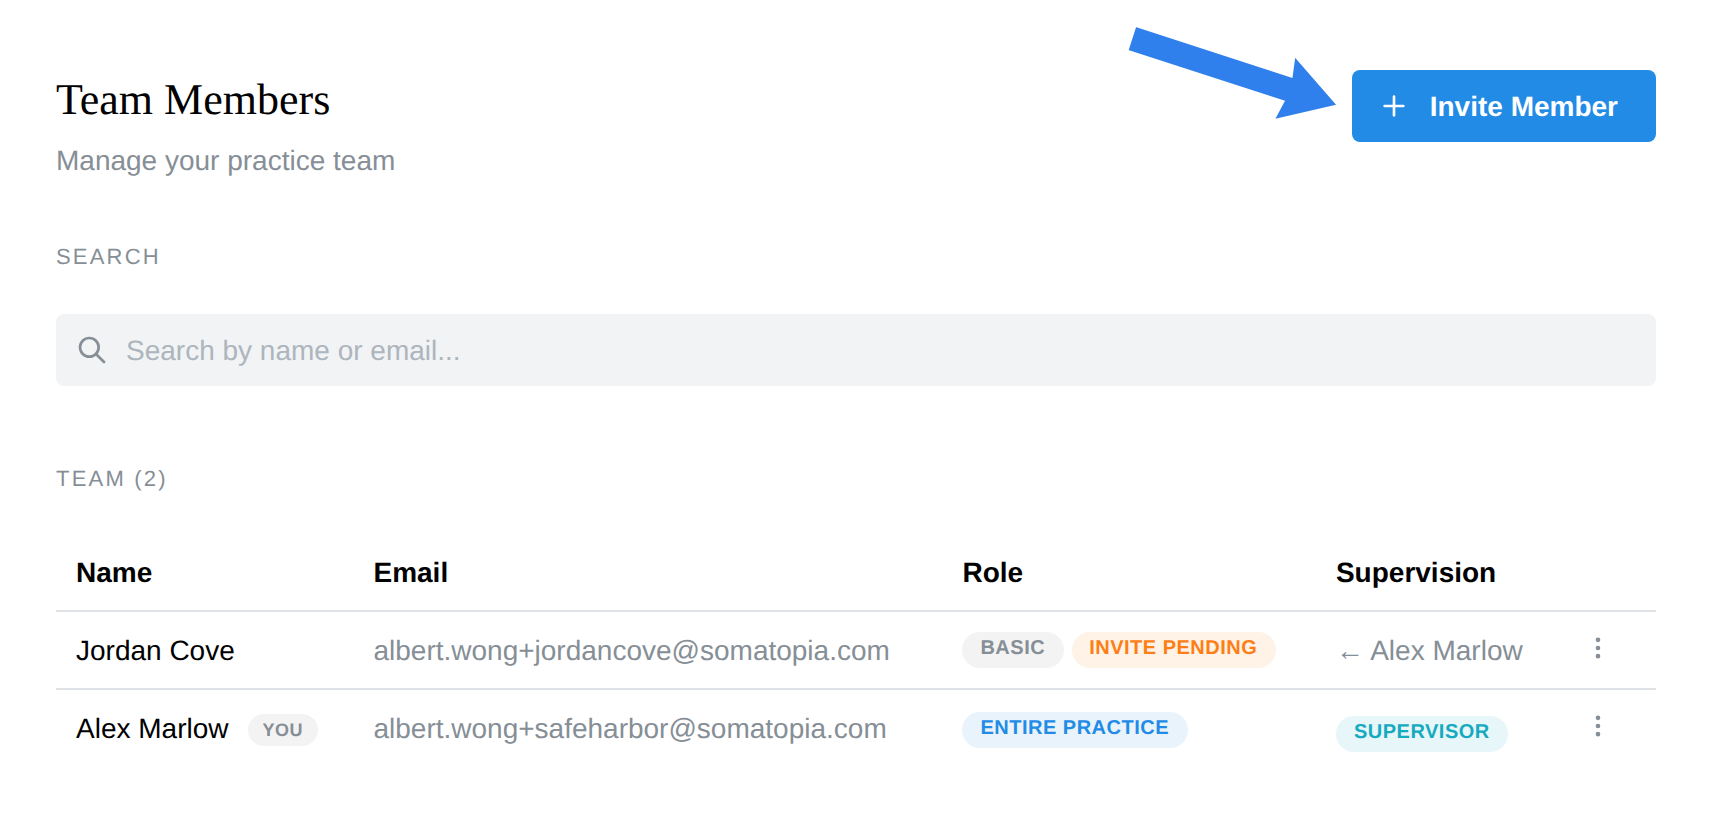
- Navigate to Settings → Team
- Click Invite Member
-
Enter the team member's first name and last name
-
Add the team member's email address
- The invitation is sent to this address, and it becomes their sign-in email
-
Click Next Step
-
Select the clinical and/or administrative role(s) for the team member
- Roles are additive — on top of one clinician access level, a team member can also hold the supervisor role and any administrative roles
- Selecting Clinician reveals four access levels (choose one): Clinician with Entire Practice Access, Clinician with full client list access, Clinician with billing access, or Basic Clinician
- For a permission-by-permission comparison, see Roles & Permissions
- Below the roles, any additional permissions that apply to the chosen roles appear as checkboxes — for example, View financial dashboards and reports for a practice manager, or Set own service rates for a Basic or Billing Access clinician. Leave them unchecked to keep the role's defaults; see Additional permissions
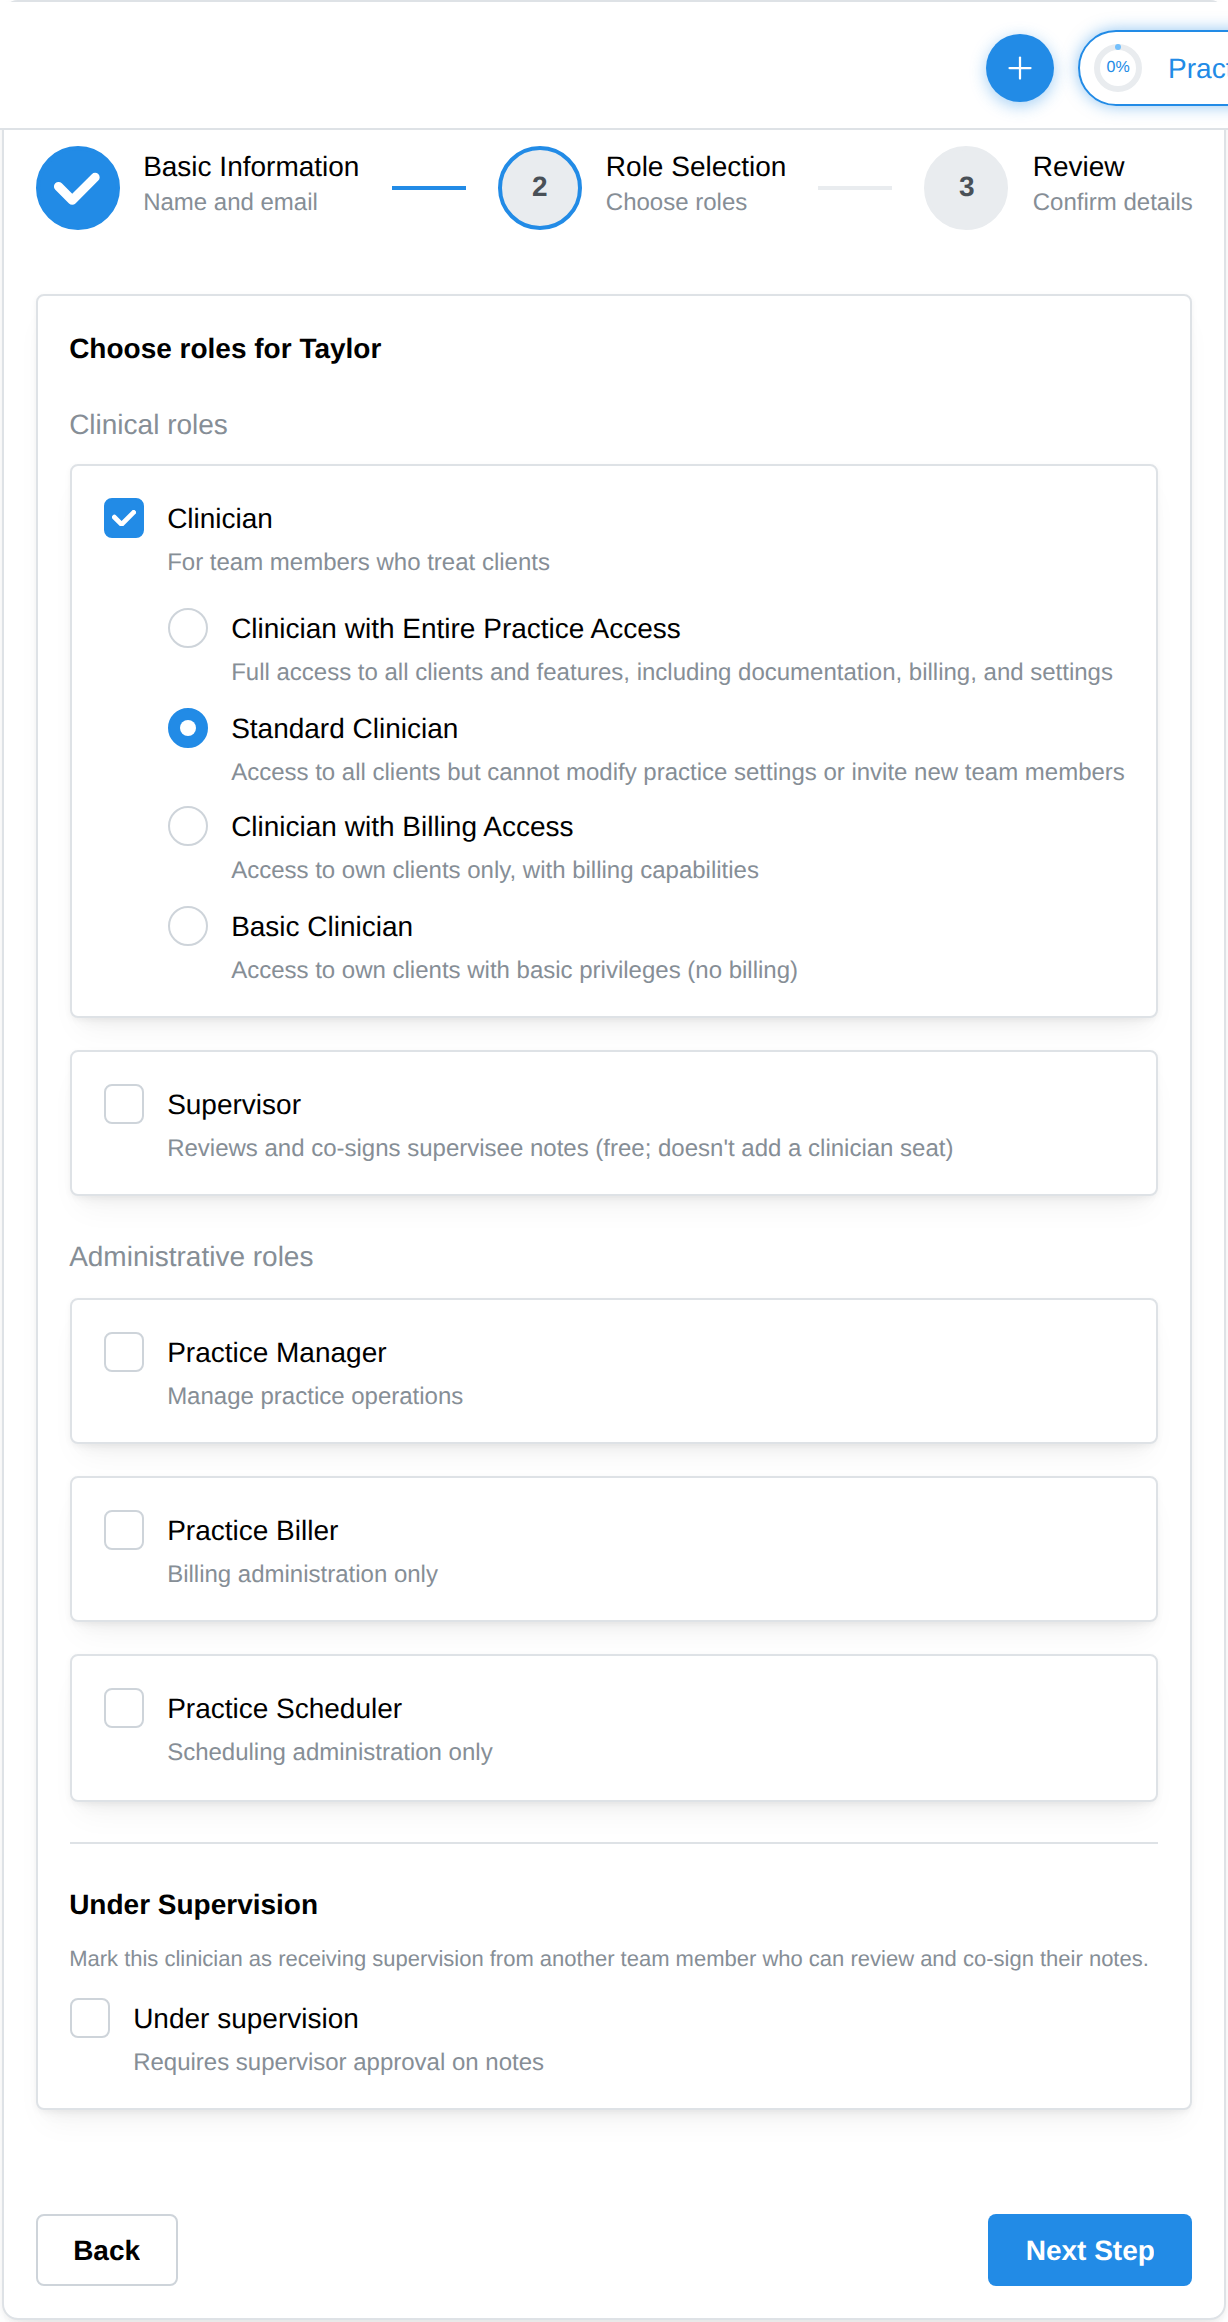
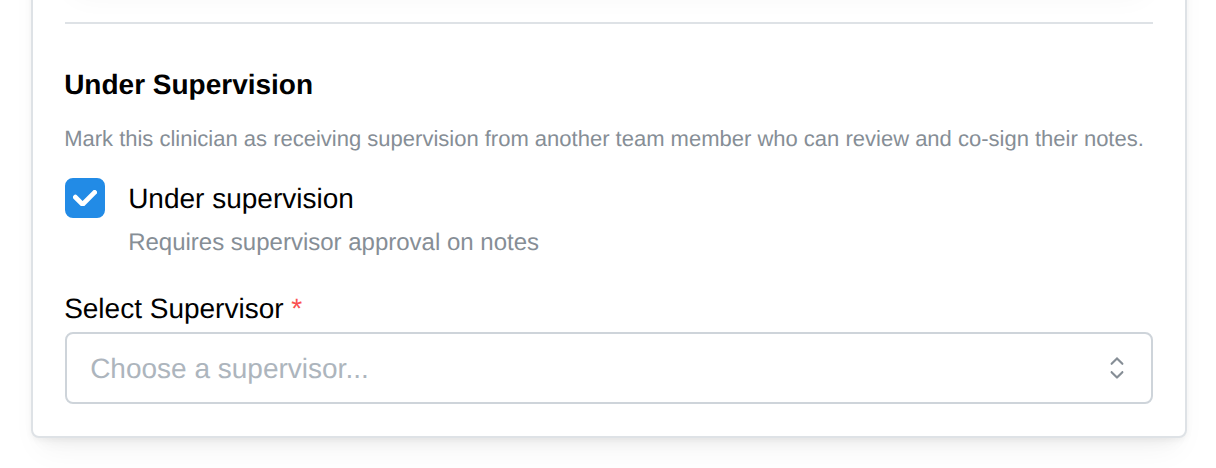
- If this team member's notes must be reviewed and co-signed, check Under supervision at
the bottom of the role step and pick their supervisor from the Select Supervisor dropdown
- The checkbox appears once a clinician role is selected, and the dropdown lists team members who hold the Supervisor role
- Click Next Step
- Review the name, email, roles, additional permissions, and supervision setup
- Click Send Invitation
The new team member's invitation will be sent to the email address you entered. They'll be able to set their own password after clicking the link in the invitation email, and they appear on the Team Members list immediately.
Troubleshooting invitation emails
Until the new member activates their account, their row on Settings → Team shows an amber Invite pending badge.
If a team member can't find the invitation email (spam folders are the usual culprit), you can resend it so it's at the top of their inbox. To do this:
- Navigate to Settings → Team
- Find the team member in question
- Click the ⋮ menu at the end of their row
- Click Resend invitation
The Resend invitation option only appears while the member's invite is still pending — once they've activated their account, the badge and the option both disappear.
Updating a team member's roles
Roles can be changed at any time. To update an existing team member's roles:
- Navigate to Settings → Team
- Click the ⋮ menu at the end of the team member's row
- Click Edit Role
- Check or uncheck the box for the appropriate role(s), and adjust supervision if needed
- Click Save Changes
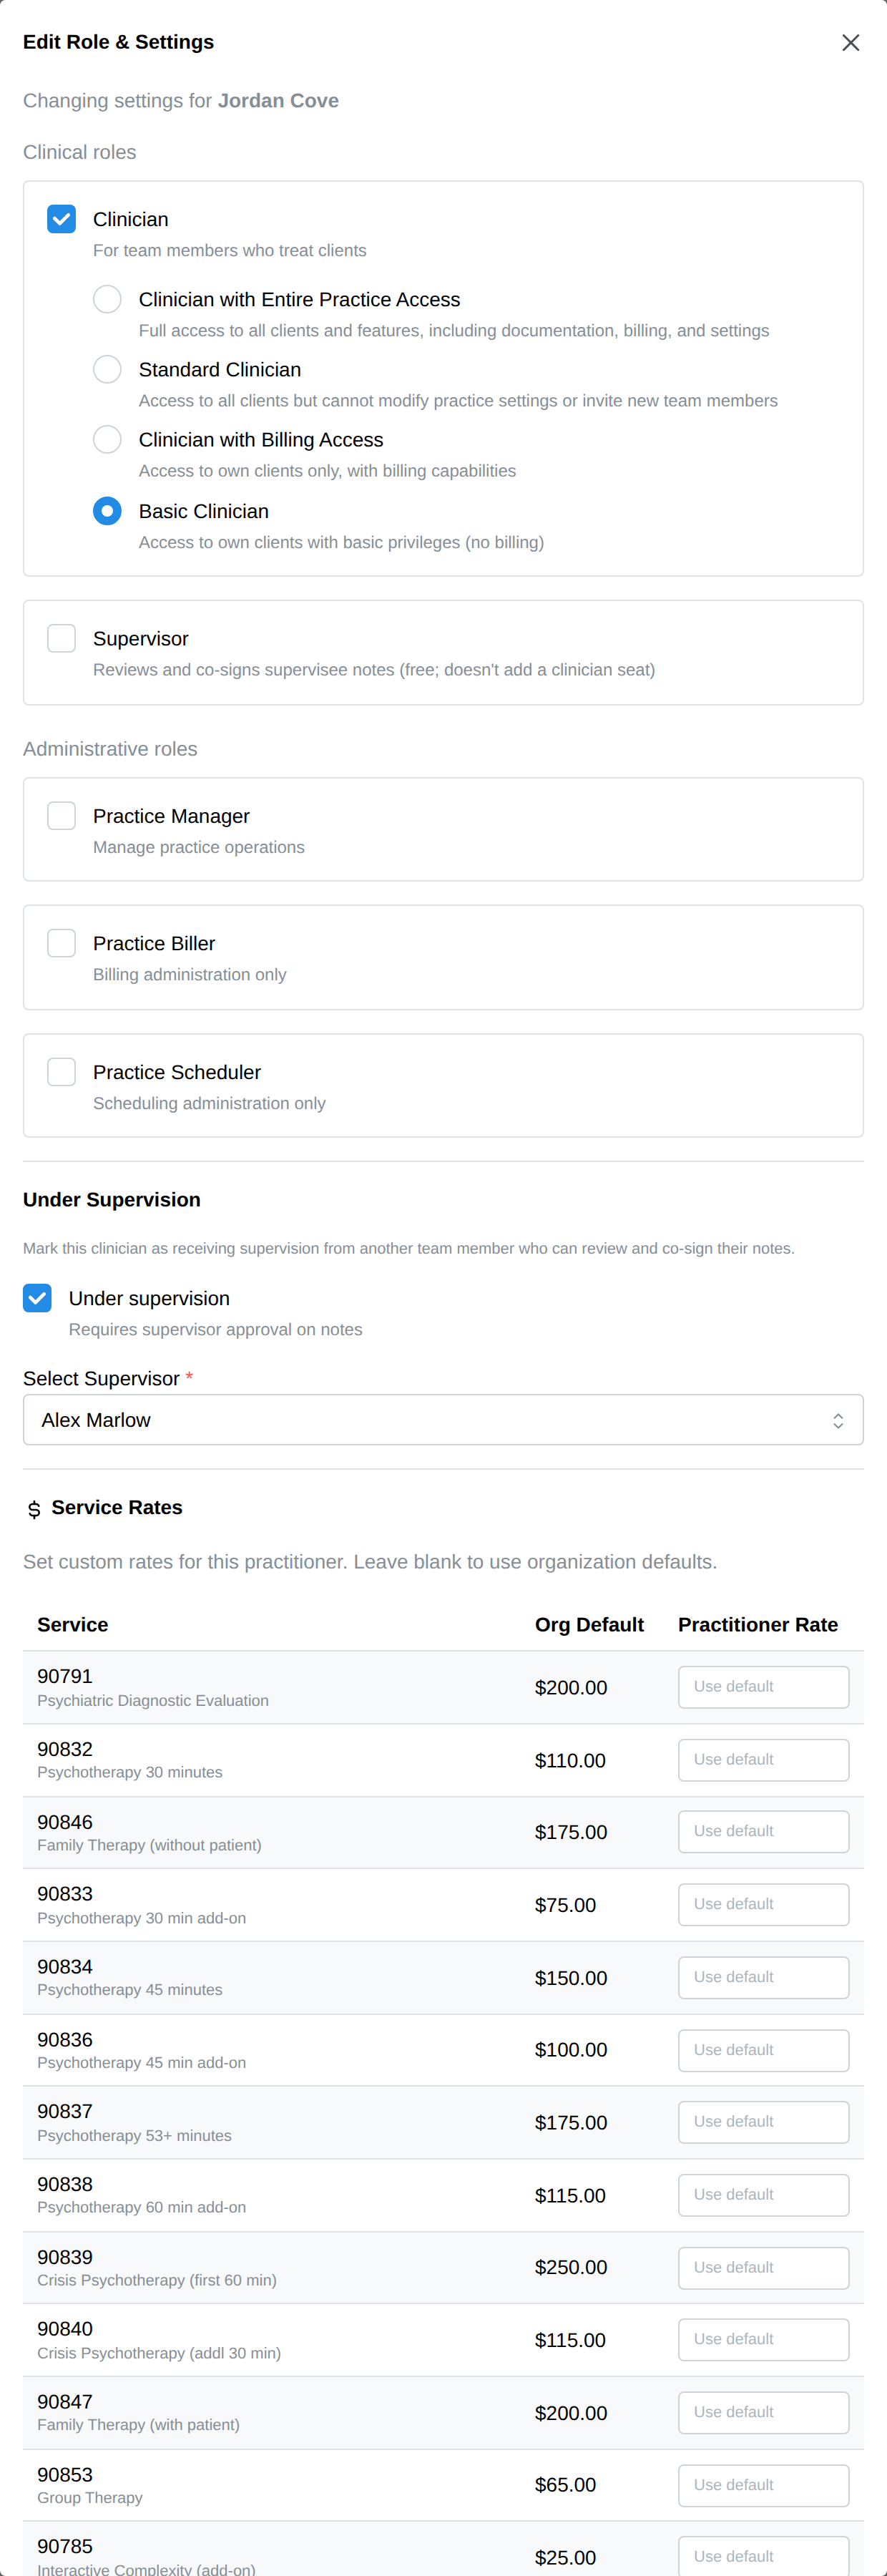
There's no need to re-invite the team member — the updated roles apply automatically.
Editing a team member's details
Practice owners and managers can correct a team member's name and claim credentials without waiting for the member to do it on their own Profile page:
- Navigate to Settings → Team
- Click the ⋮ menu at the end of the team member's row
- Click Edit details
- Update the name and phone and, for clinicians, the NPI, taxonomy code and licenses
- Click Save
These are the values that print on claims and billing documents for that clinician. If the taxonomy code is left blank, claims are filed under the Mental Health Counselor code (101YM0800X), so set it for anyone whose discipline is different — see Taxonomy codes. To change your own details, use Settings → Profile.
Removing a team member
To remove a team member from your practice:
- Navigate to Settings → Team
- Click the ⋮ menu at the end of the team member's row
- Click Remove
- Review the what's attached summary in the confirmation dialog — it lists anything still linked to this member (supervisees, upcoming appointments, and so on) so you can hand those off first
- Type REMOVE to confirm, then click Remove Member
You can't remove yourself, and removal doesn't delete the member's documentation — their signed notes and records are preserved for record-keeping.