Availability & Blocked Time
Set your availability once, and online booking only ever offers clients times that fit it. Block time off with calendar events when real life interrupts the routine.
Setting your availability
- Go to Settings → Online Booking.
- Under Weekly Availability, switch each working day to Available and set its start and end times. Days start out Monday–Friday, 9:00 AM–5:00 PM.
- Turn on Accept Online Booking Requests at the top (it's off by default — clients can't book anyone who hasn't turned this on).
- Click Save Changes (top right).
Your weekly hours are always shown on this page, whatever the switch says — every clinician can see and edit their own, at any access level. With the switch off, the hours still shade your calendar; they just aren't bookable by clients yet.
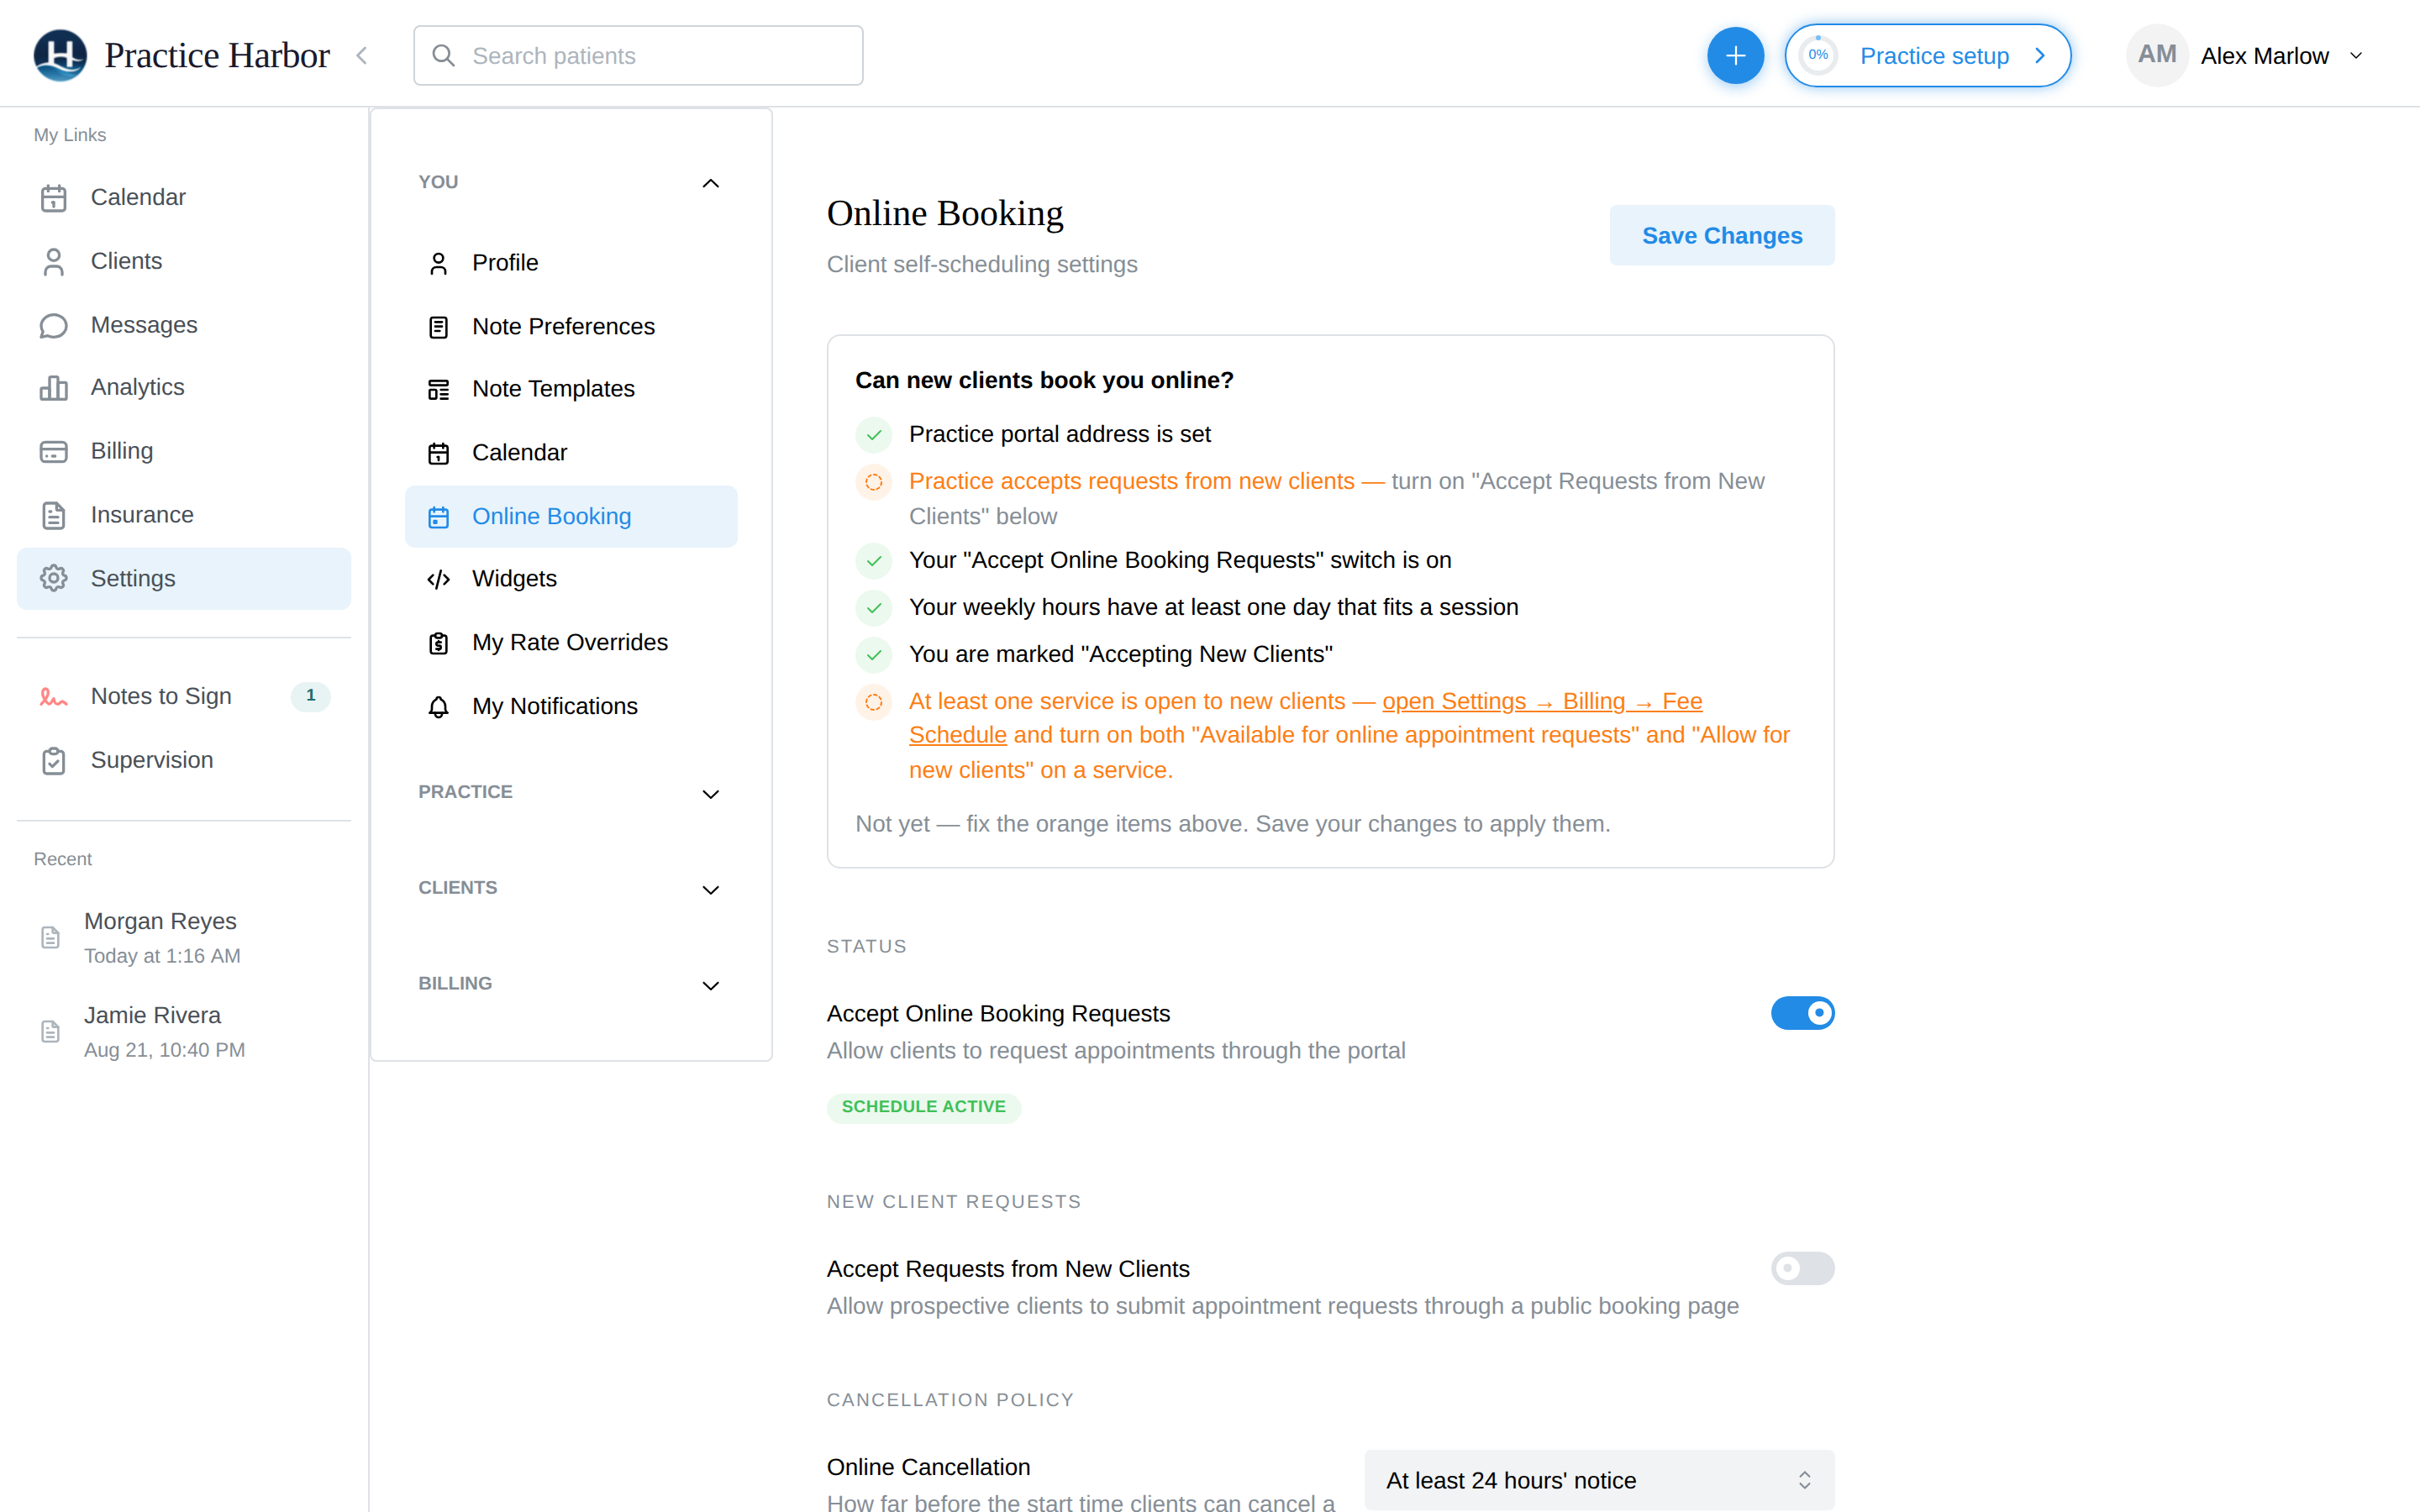
That's it — clients can now request appointments in those hours from the portal.
Split shifts: to take a midday break, click the + at the end of a day's row and set two ranges — say 9:00 AM–12:00 PM and 4:00 PM–8:00 PM. The red × removes a range.
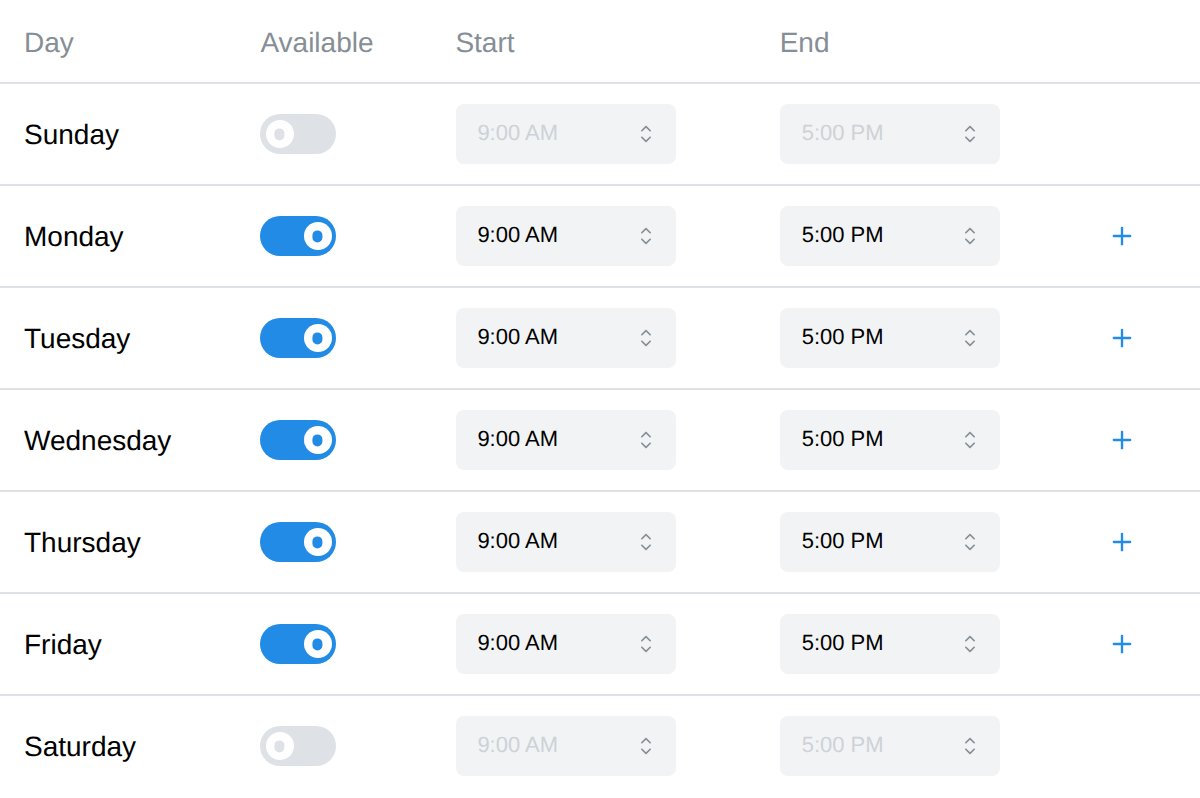
Times are in your practice's time zone (shown and changed at Settings → Calendar). If your hours look shifted to clients, fix the time zone there — don't shift your ranges.
Availability is personal: each clinician sets their own on this page, under their own login. There's no screen for editing a colleague's hours.
Choosing how sessions get booked
On the same page, two sections tune what clients are offered. Adjust them and click Save Changes:
- Duration — session length clients book: 30–90 minutes (default 50).
- Buffer Between — gap kept after each session: up to 30 minutes (default 10).
- Appointment start times — on the hour, on the half hour (9:00, 9:30), on the quarter hour, or based on service duration.
- Minimum Notice — how soon clients can book: 24, 48, or 72 hours ahead (default 24, so no surprise same-morning sessions).
- Maximum Advance — how far ahead: 1 week to 2 months (default 1 month).
Blocking time off
Vacation, lunch, a staff meeting — anything that should take time away from online booking is a calendar event:
- On the calendar, click the + button in the top bar and choose New Appointment (or just click an empty spot on the calendar).
- Switch the toggle at the top of the panel from Appointment to Event.
- Enter a title ("Lunch", "Staff Meeting"), and set the times — or tick All day to block the whole day (perfect for vacation). Tick Recurring for something like a weekly lunch block.
- Click Create Event.
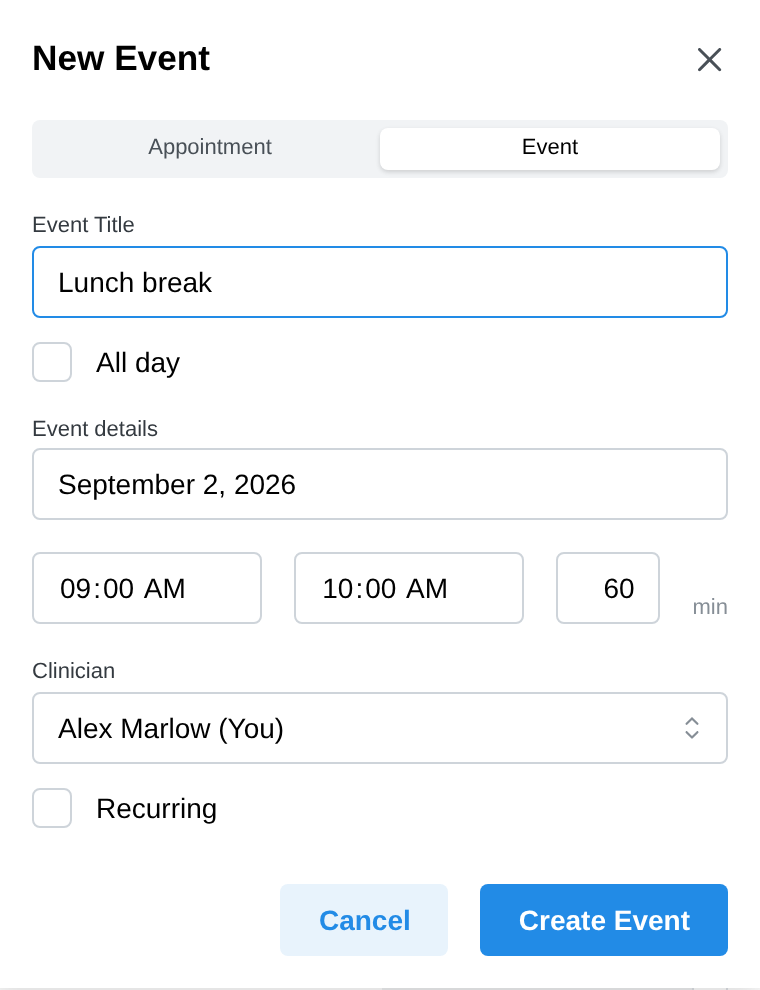
The event's window disappears from online booking immediately; delete the event to release the time. Appointments already on your calendar block their slots automatically too, and if you've connected Google Calendar, busy events there block booking as well — your personal calendar protects your practice calendar without any extra setup.
Blocking time on a colleague's calendar
Owners, practice managers, and schedulers can put an event on another clinician's calendar — so the front desk can mark a clinician away without asking them to do it themselves:
- Open the Event tab as above. A Clinician picker appears at the top for seats that can book on someone else's behalf.
- Pick whose calendar the event belongs on. (Staff seats without their own calendar must choose — there's no default, so a block can't land on the wrong calendar by accident.)
- Set the title and times as usual and click Create Event.
The block keeps that clinician's time from being booked online, works for recurring events, and syncs to their connected Google Calendar. Solo practices see no change — your events are always your own.
Letting new clients book
Availability covers your existing clients booking through the portal. For prospective clients to book through your public booking page or website widget, one more switch must be on:
- Go to Settings → Online Booking.
- Turn on Accept Requests from New Clients in the New Client Requests section.
- Optionally tick Allow couples requests so new clients can request couples therapy.
These two apply to the whole practice, so only the practice owner, clinicians with entire-practice access, and practice managers can change them — everyone else sees them greyed out.
Troubleshooting & FAQ
Clients say they see no available times. Work down this list:
- Is Accept Online Booking Requests on — and saved? (Off is the default.)
- Is the day switched to Available, with a range long enough for a full session plus buffer? Saving warns you ("Window too short") if a range can't fit even one session.
- Is the time already taken by an appointment, a calendar event, or a Google Calendar busy block? An All day event blanks the entire day.
- Are they looking too soon? With 24-hour minimum notice, "today" is usually empty by design.
A new client can't book at all. That's the separate practice-wide switch — see Letting new clients book. Your own availability being on isn't enough.
Does availability stop me from scheduling whenever I want? No. It only limits what clients can book online. You and your staff can always create appointments at any time — the calendar lightly shades your off hours as a visual cue but never blocks or warns.
A clinician says they can't find Weekly Availability. It's on their own Settings → Online Booking page, always visible, for every access level. Make sure they're on that page under the You section (not the practice-wide Widgets or Calendar settings).
Do cancelled sessions free the slot back up? Yes — cancel (or mark no-show), and the time is offered online again immediately.
Can the owner set everyone's hours? No — each clinician logs in and sets their own.