Note templates
Progress notes are generated into a template — the section structure your documentation follows. Start from the built-in gallery, customize anything, or build your own from scratch at Settings → Templates.
In this guide, we'll cover:
- Standard templates
- Adding a template to your library
- Creating or customizing a template
- Managing your library
- Setting your default template
- Note preferences
Standard templates
The gallery ships 13 standard templates in three categories:
Therapy Notes
- Therapy Intake
- Follow-up Therapy (the starting default)
- Couples Therapy
- Family Therapy
- Group Therapy
Clinical Formats
- SOAP (Subjective, Objective, Assessment, Plan)
- DAP (Data, Assessment, Plan)
- BIRP (Behavior, Intervention, Response, Plan)
- GIRP (Goals, Intervention, Response, Plan)
- PIRP (Problem, Intervention, Response, Plan)
Specialty
- Supervision Note
- Discharge Summary
- Crisis Note
Adding a template to your library
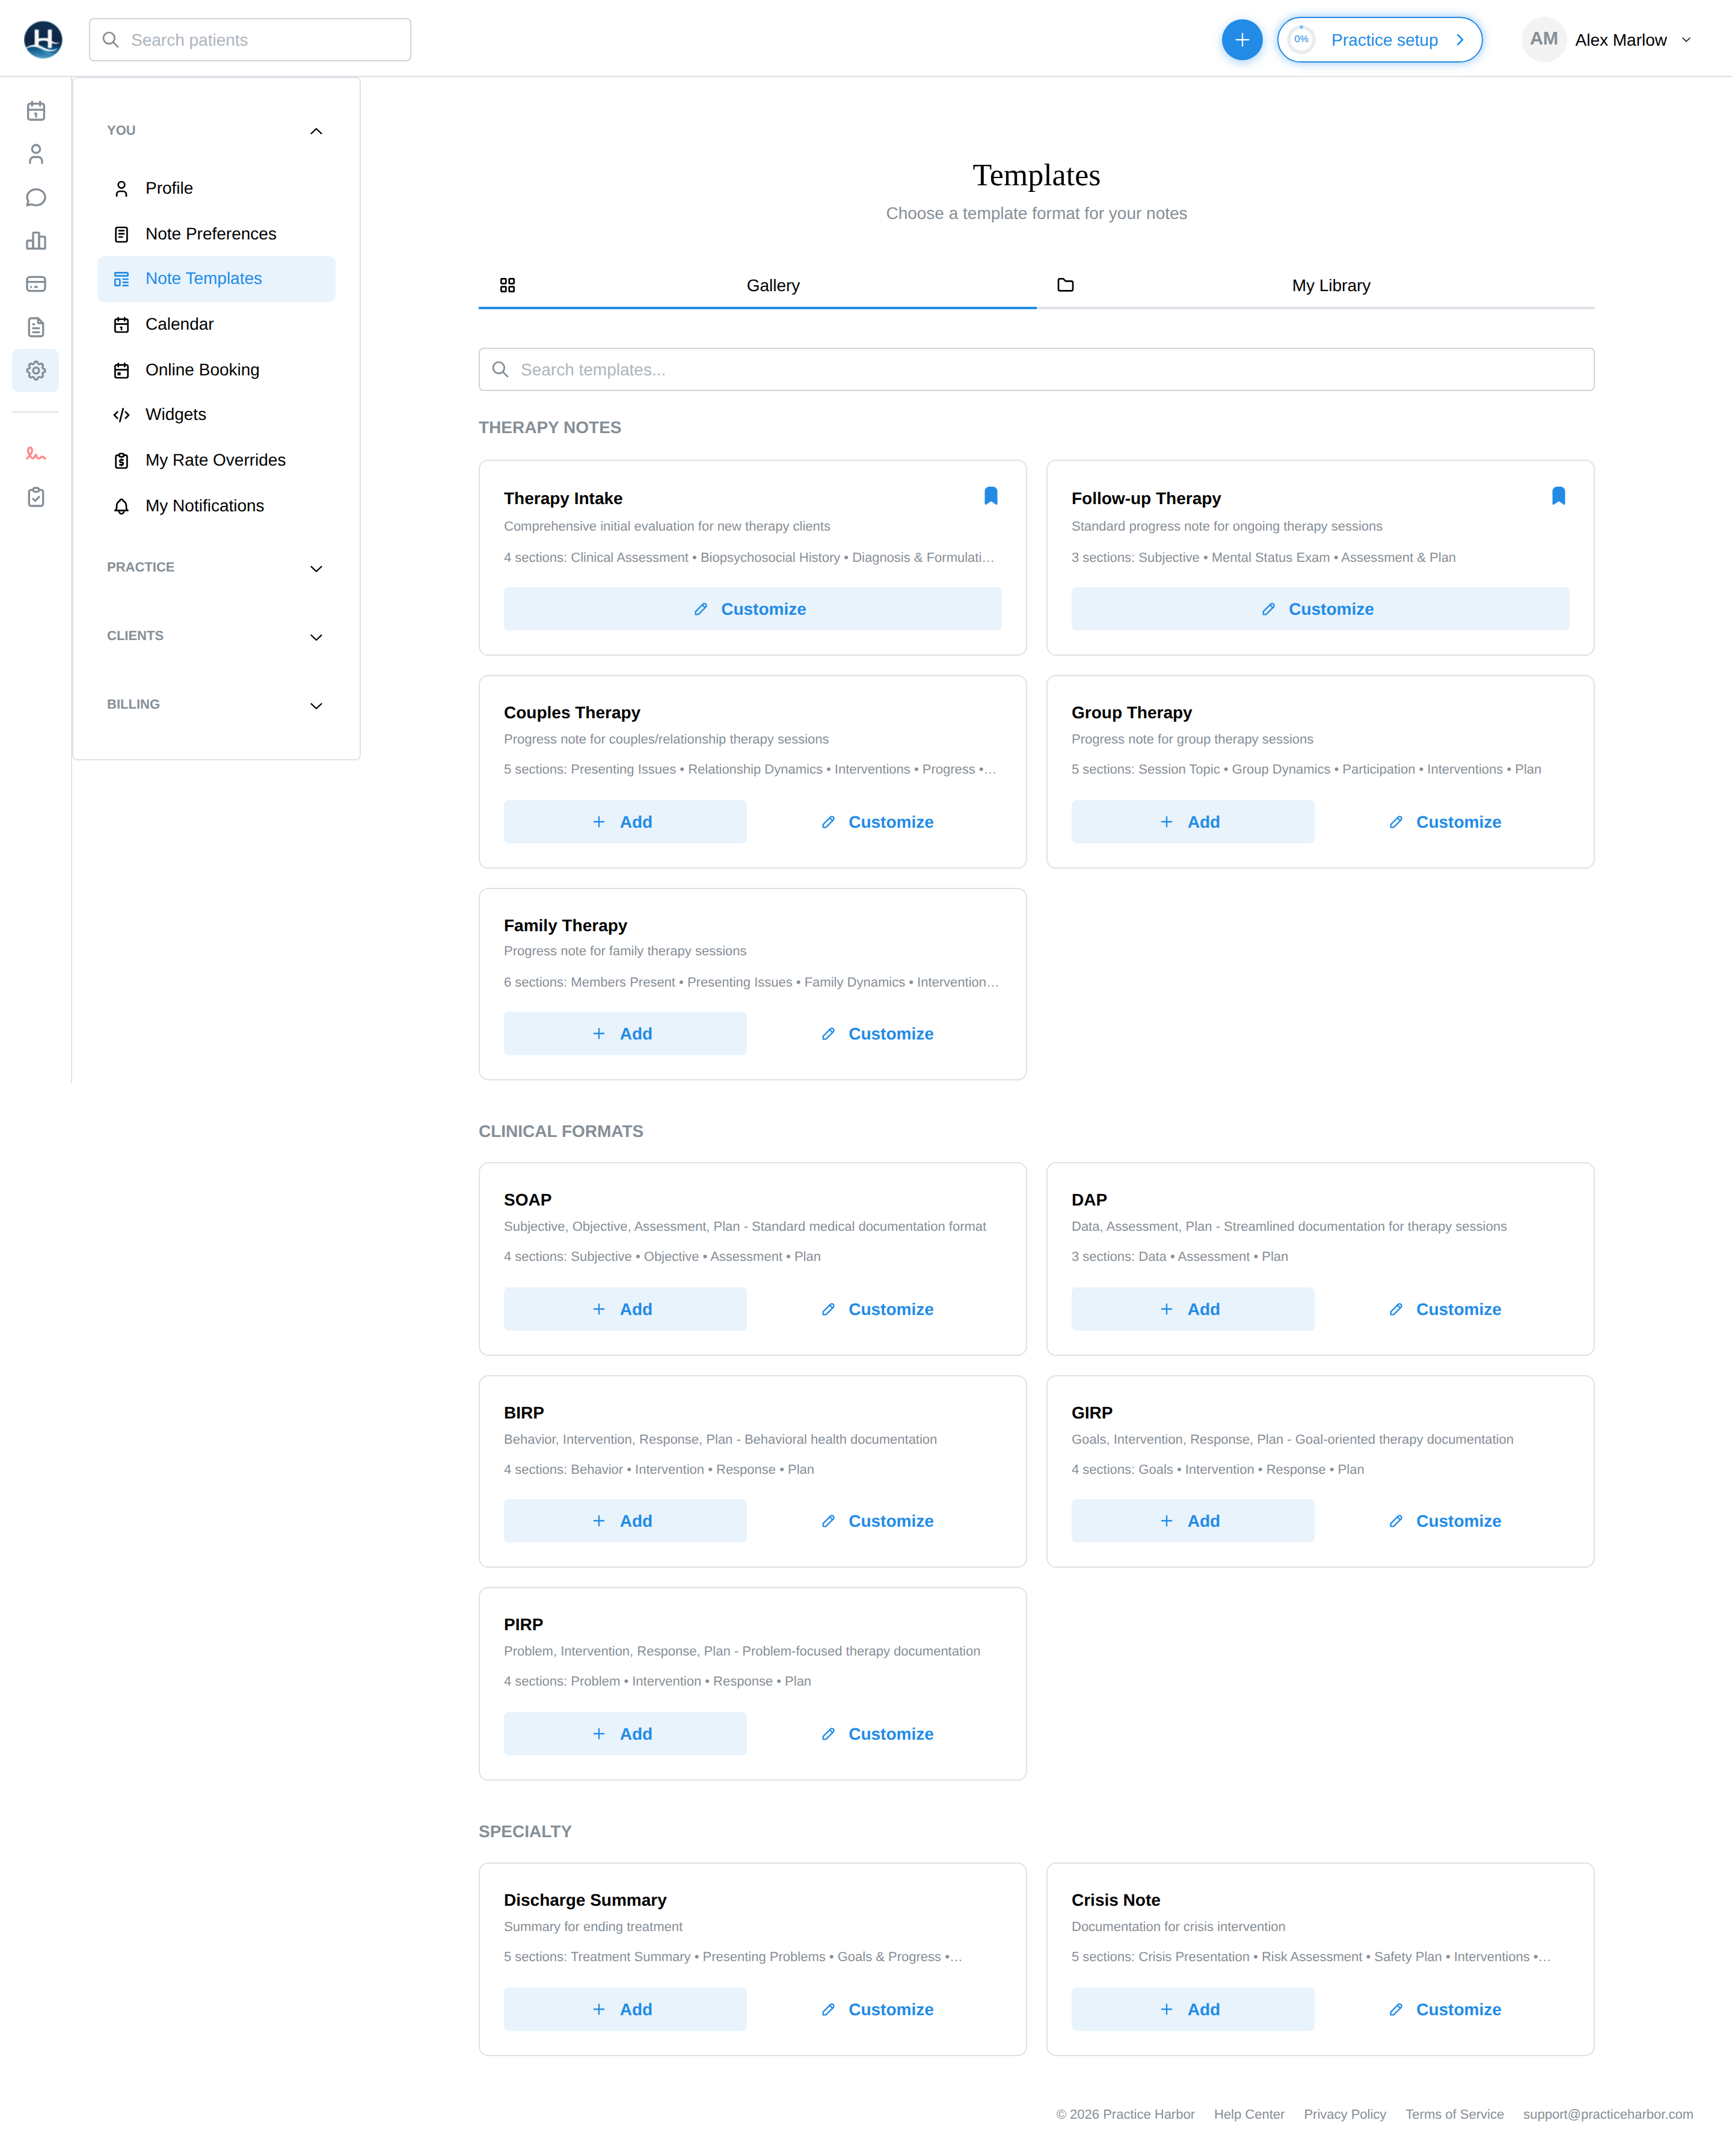
- Go to Settings → Templates, Gallery tab.
- Click any card to preview its sections.
- Click Add (on the card) or Add to Library (in the preview) to copy it into My Library as-is — or Customize to open it in the editor and make it yours first.
Only templates in your library appear in the recording page's Format picker, so "Add" is the first step to using anything from the gallery.
Creating or customizing a template
- On the My Library tab, click New Template (or Customize on a gallery template to start from its structure).
- Name it, then build the Sections: each has a name and an optional brief description — the description guides the AI on what belongs in that section, so a sentence like "client's reported mood, sleep, and stressors this week" pays for itself in draft quality.
- Drag sections to reorder; add and remove freely (a template needs at least one).
- Click Save — the template appears in My Library, ready to pick at recording time.
Custom templates let you match your practice's documentation requirements or insurance expectations. Editing a template later never changes notes already generated with it — only future notes.
Form sections: checkboxes, dropdowns and text boxes
A section doesn't have to be a paragraph. Switch it to a Form and it becomes a set of fields you fill by clicking: checkboxes, pick-one lists, Yes / No, dates, short answers. When you save the note, the answers are written into the section as plain "Label: answer" lines, so the signed note reads normally.
- In the template editor, find the section and change its type from Text to Form.
- Click Add field, type the field's label, and choose its type: Yes / No, Short answer, Paragraph, Multiple choice (pick one), Checkboxes (pick several) or Date. For the two list types, type one option per row.
- Tick Req. on any field that must be answered before the note can be signed. (A required field never blocks saving a draft.)
- Click Save.
Adding a text box to a checkbox or choice
Some options need an explanation: "Other", "Assessed:", "Next session scheduled for:". Give that option its own text box:
- Under the option, tick Text response.
- Optionally type a hint. It shows inside the empty box as a prompt (for example, "what was assessed").
- Click Save.
When you write a note, the box opens right under the option as soon as you check it (or pick it, on a pick-one field), and stays hidden otherwise. What you type is saved next to the option: "Interventions Used: Assessed: sleep patterns; Role played". Unchecking the option removes its text.
Have a long list? Click Suggest text responses at the bottom of the section. It ticks Text response on every option that looks like a write-in: "Other", a label ending in a colon, an unfinished sentence such as "Coached client on", "(see description below)", "please explain". It can't know about a one-word item like "Challenged", so tick those yourself. Look the ticks over, untick any you don't want, then save. A form you upload as a PDF comes in with these already ticked.
Managing your library
Each My Library card's ⋯ menu offers:
- Set as Default — the yellow Default badge marks your current one.
- Duplicate — copy a template as a starting point for a variant.
- Set Draft / Retire / Set Active — lifecycle states: drafts are works in progress, retired templates leave your list (a "Show retired" toggle brings them back — retiring is reversible).
- Delete — permanent, with confirmation.
Setting your default template
Three ways, same result — the template preselected for every new recording:
- Settings → Note Preferences → Default Template (shown below)
- My Library card menu → Set as Default
- On the recording page itself: pick a different Format and click the inline Set as default link
Note preferences
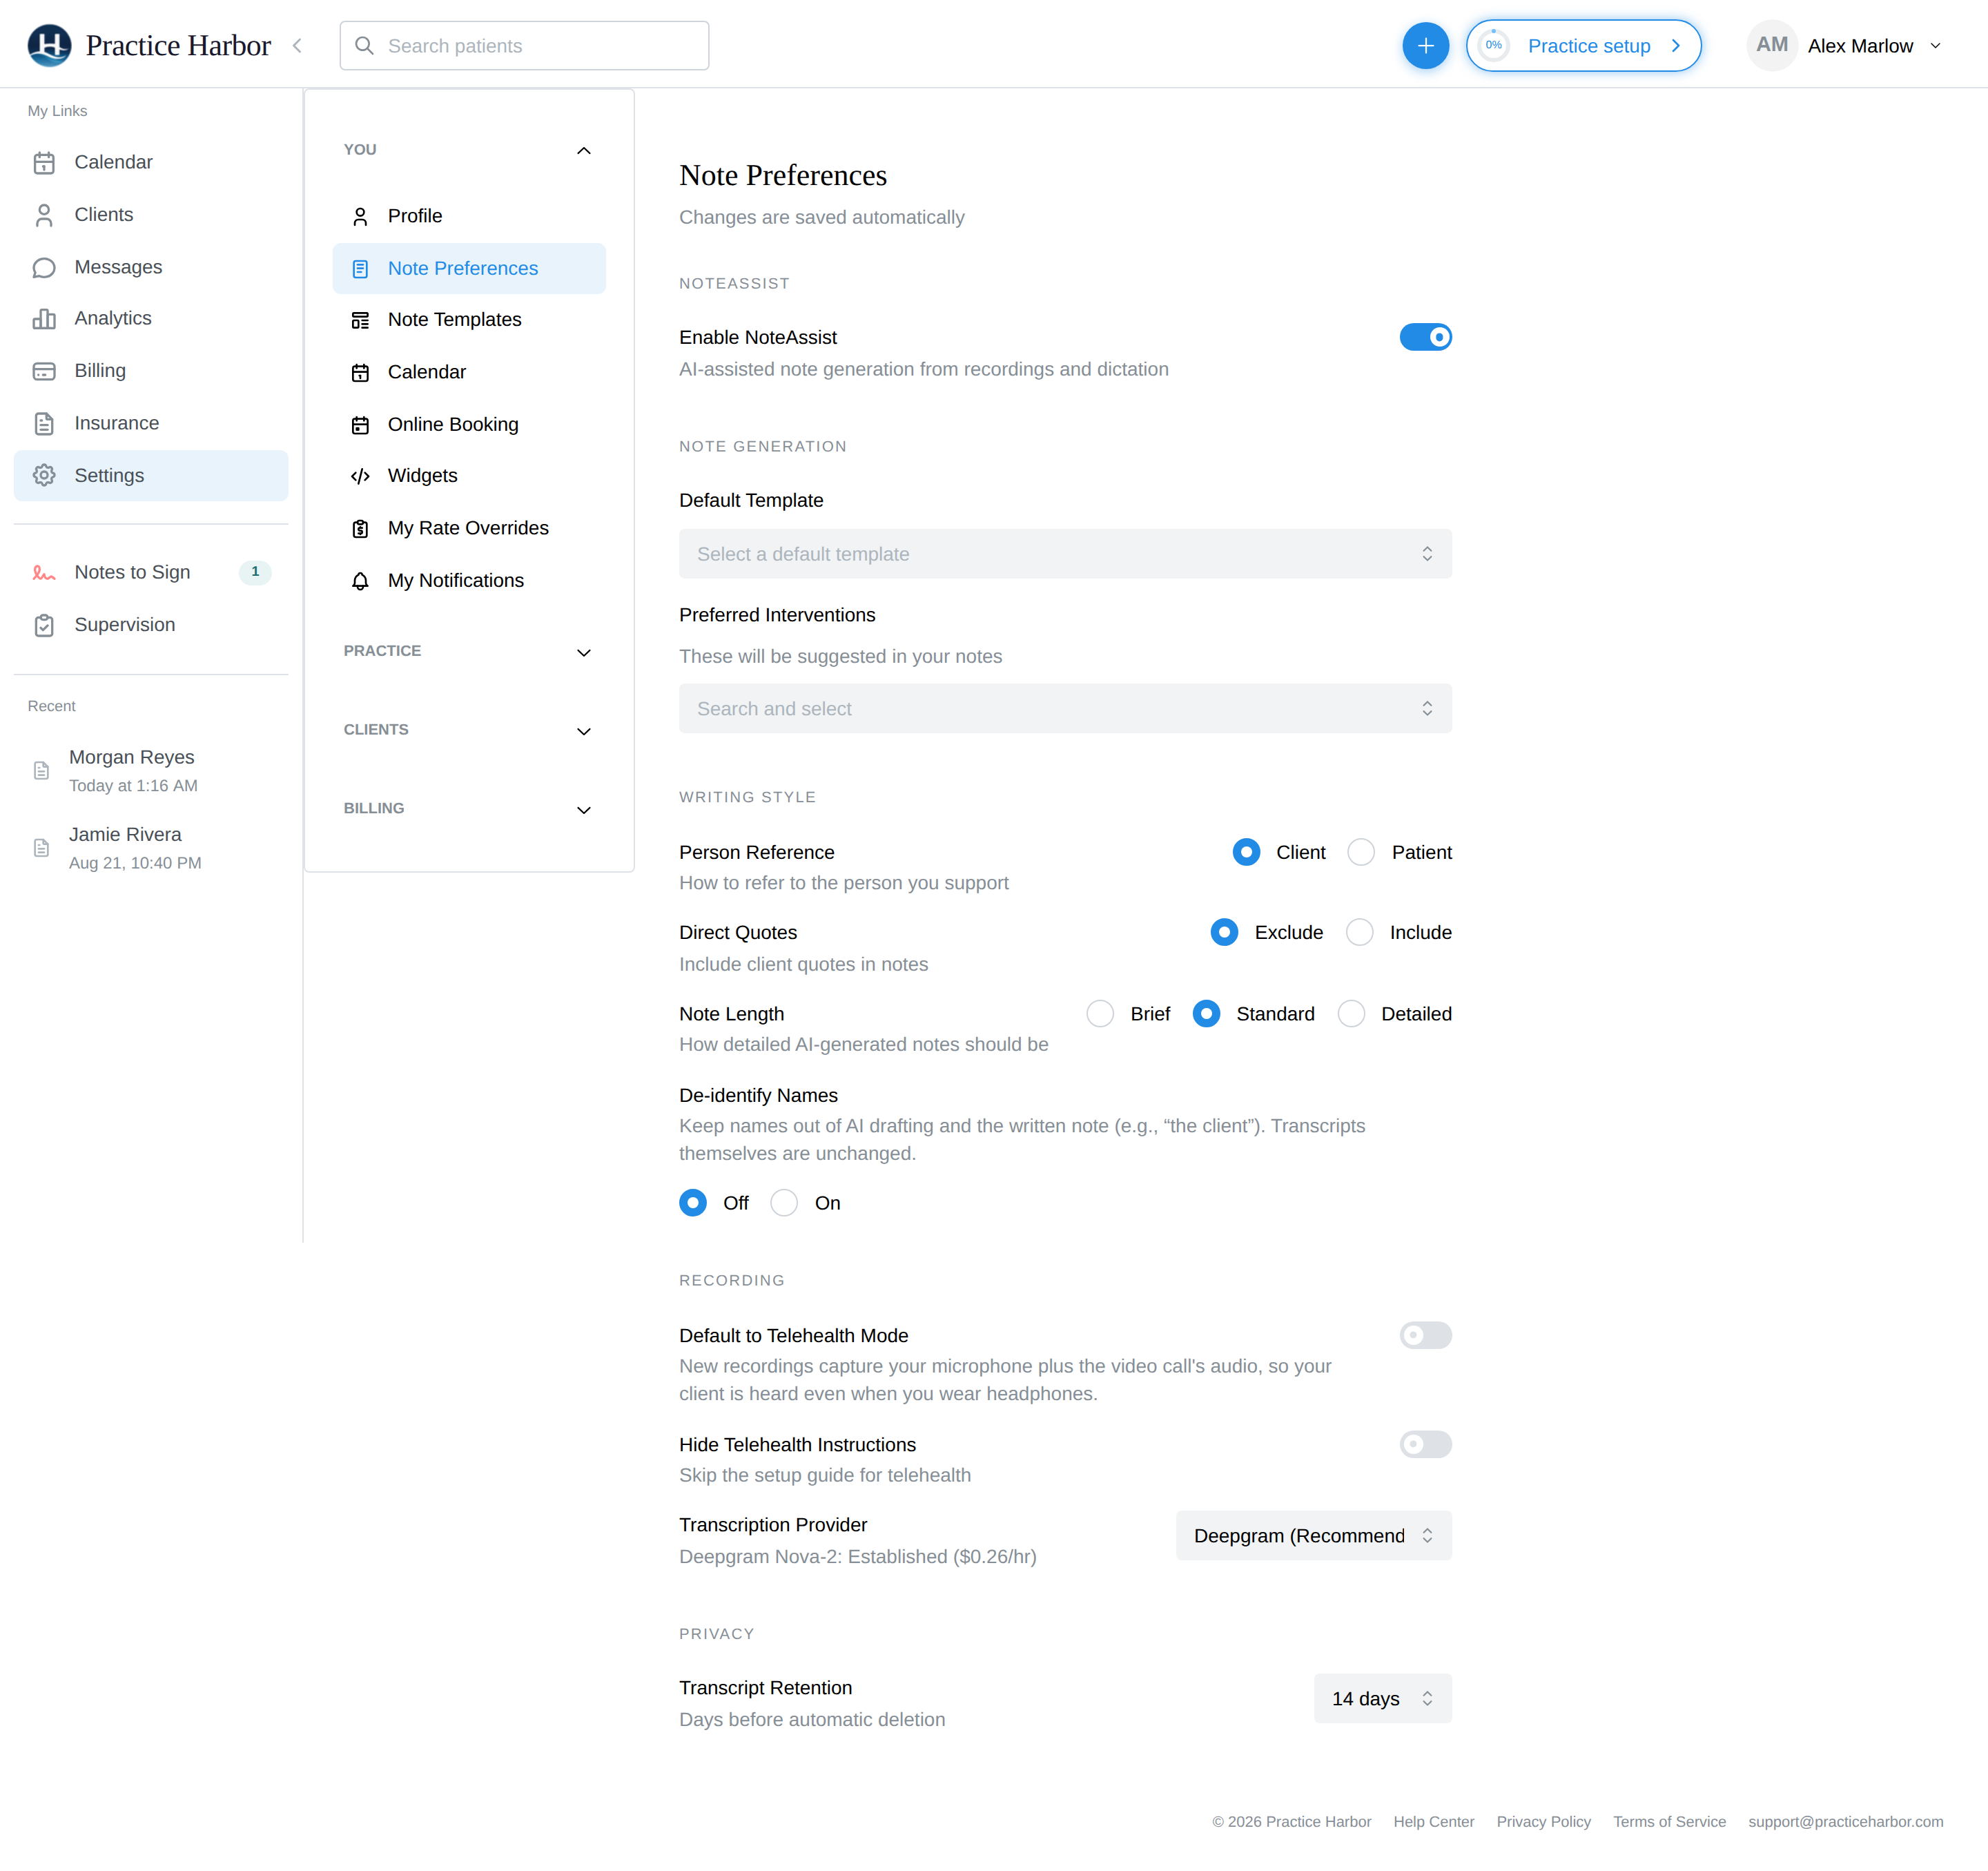
Settings → Note Preferences shapes how the AI writes, beyond which template it fills (everything here auto-saves):
- Enable NoteAssist — the master switch at the top of the page; when it's off, AI note generation is disabled and the preferences below are greyed out (your settings are kept and restored when you re-enable it)
- Default Template and Preferred Interventions (modalities the AI should recognize and suggest — CBT, DBT, ACT, EMDR, and more)
- Writing style — refer to the person as Client or Patient; include or exclude direct quotes; note length Brief / Standard / Detailed
- De-identify Names — replace names with roles ("the client") in generated notes
- Recording defaults — default to telehealth mode, hide the telehealth setup guide, and the transcription provider choice
- Transcript Retention — days before session transcripts auto-delete (default 14)