Insurance billing overview
Insurance billing lets you file electronic claims with payers, track their status, and post insurance payments (ERAs) — all inside the platform. This page is the map; the rest of the Insurance section covers each step in depth.
In this guide, we'll cover:
Turning insurance on
Insurance features are off by default (many practices are self-pay only). To enable them:
- Go to Settings → Insurance & Superbills
- Turn on Enable Insurance Features
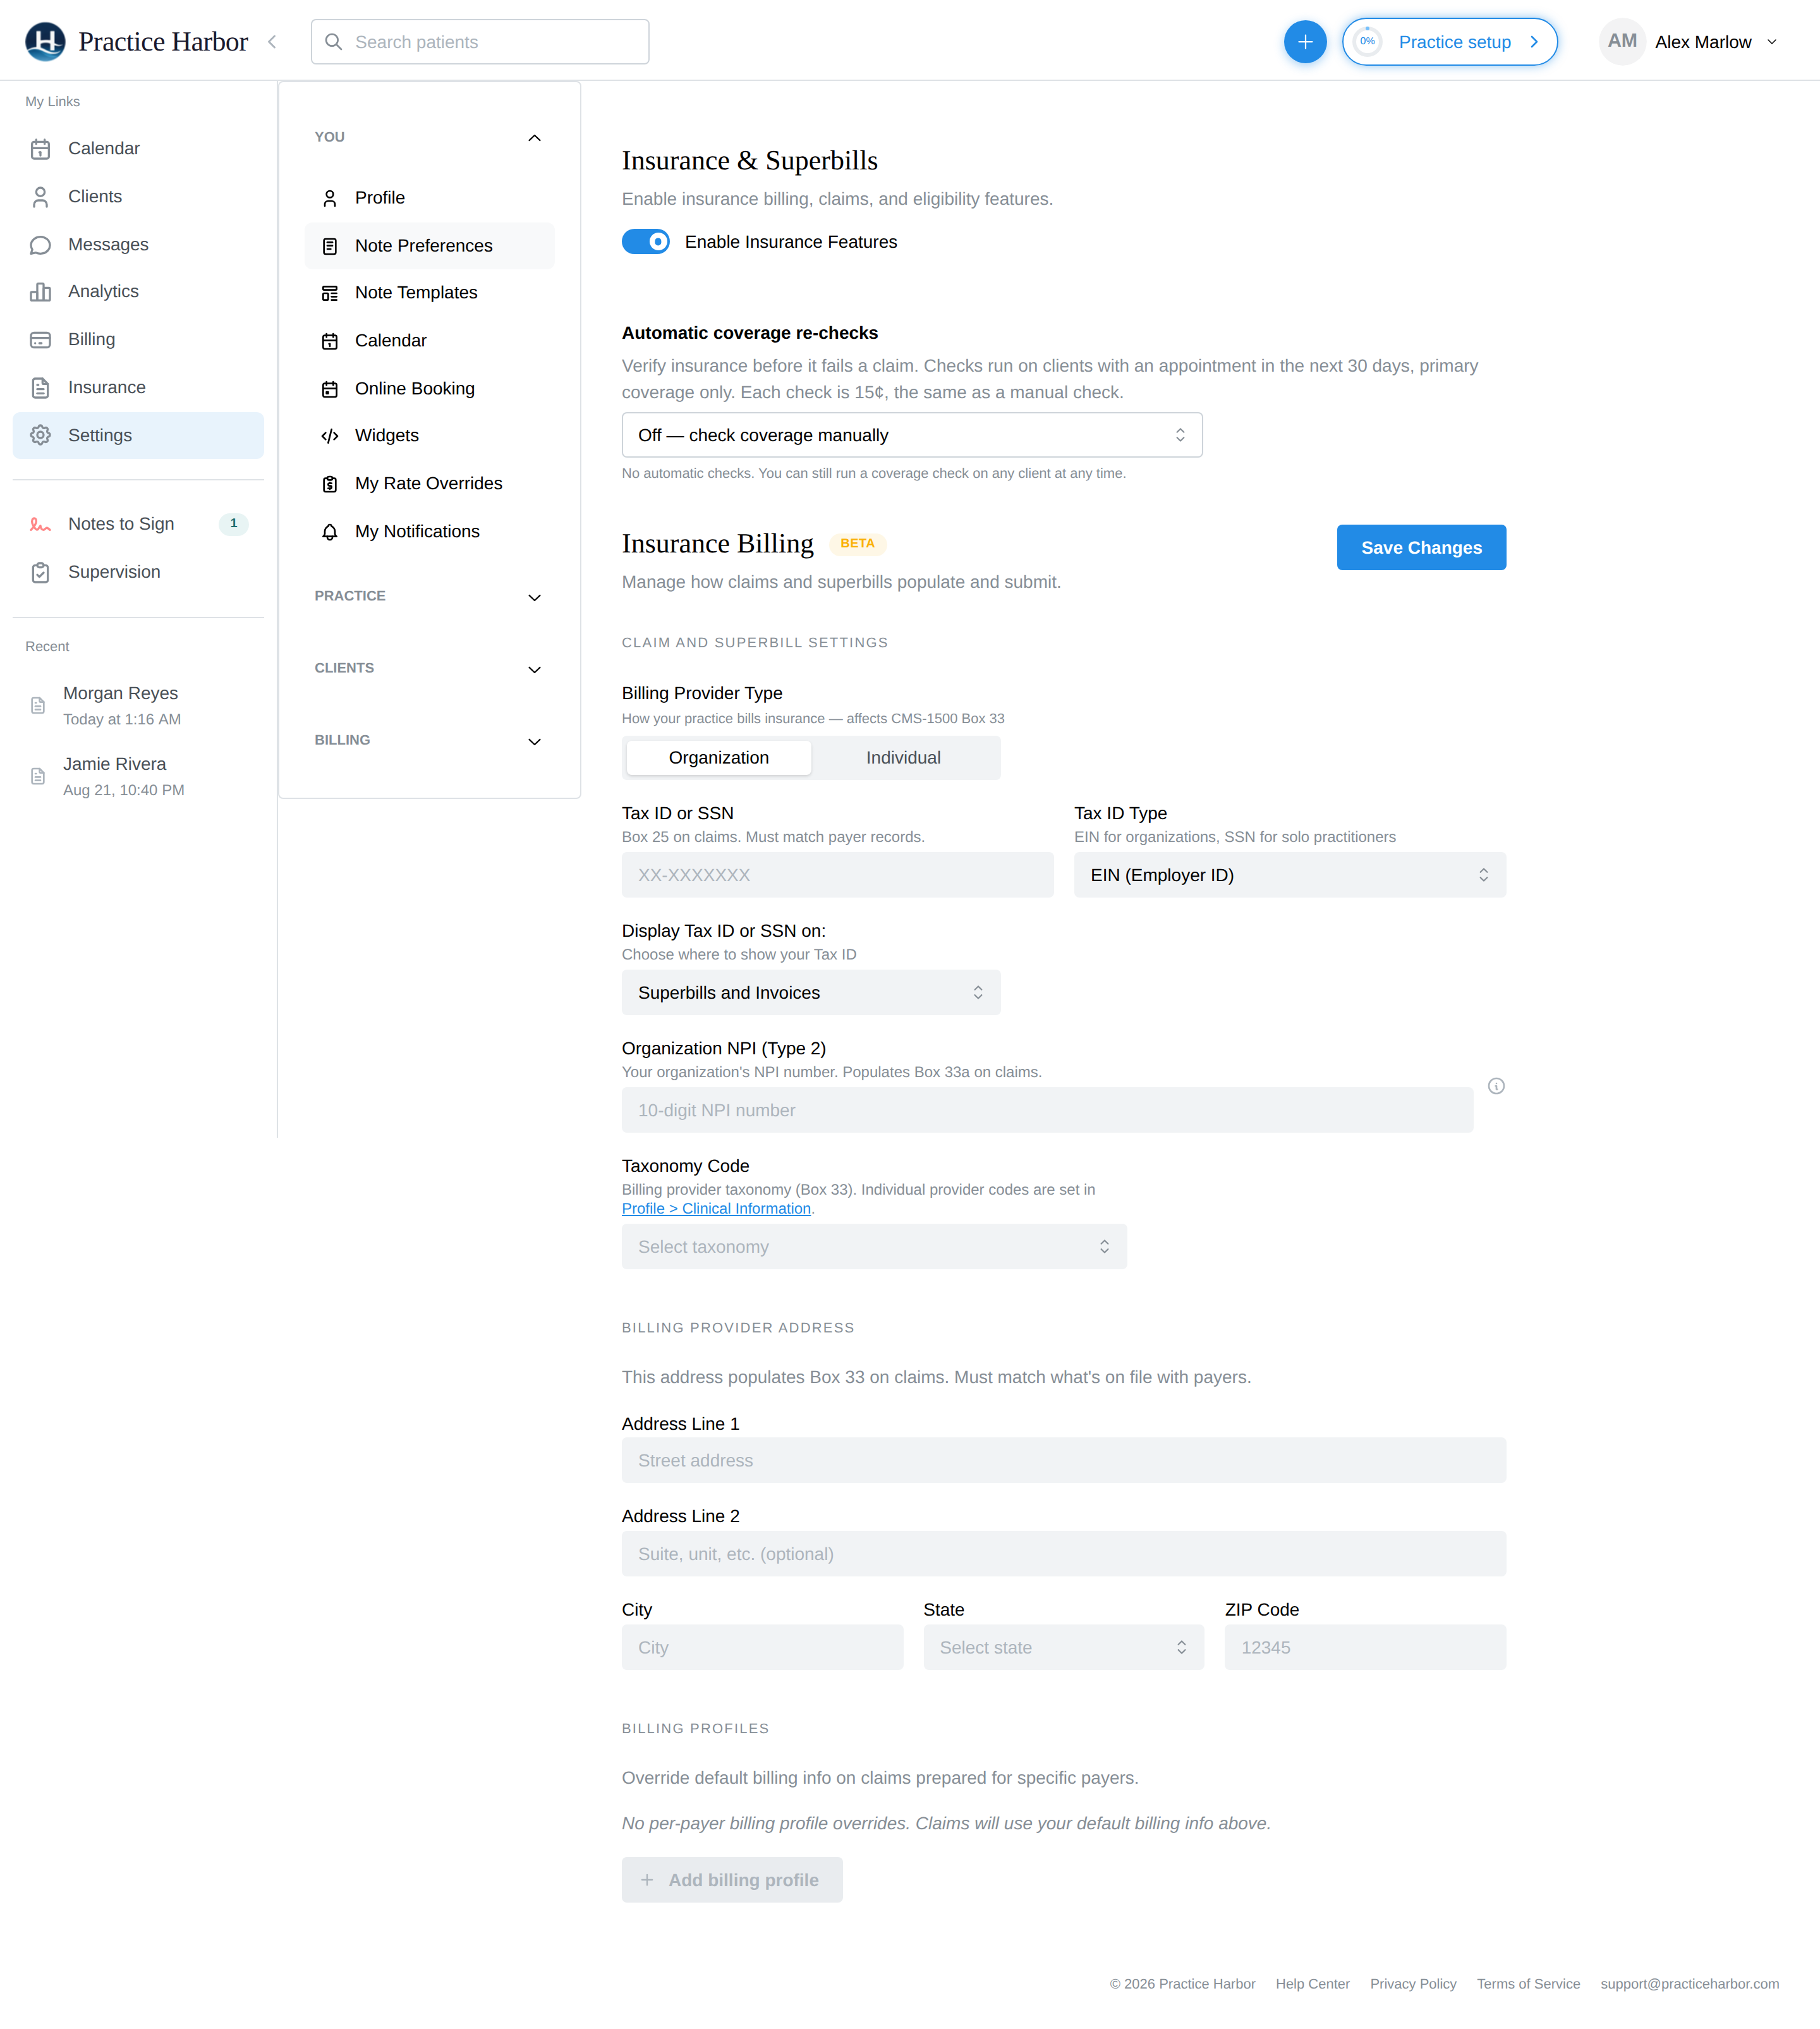
Once enabled, Insurance appears in the left navigation (for roles with practice-wide reporting access — the same roles that see Analytics).
The insurance hub
Click Insurance in the navigation:
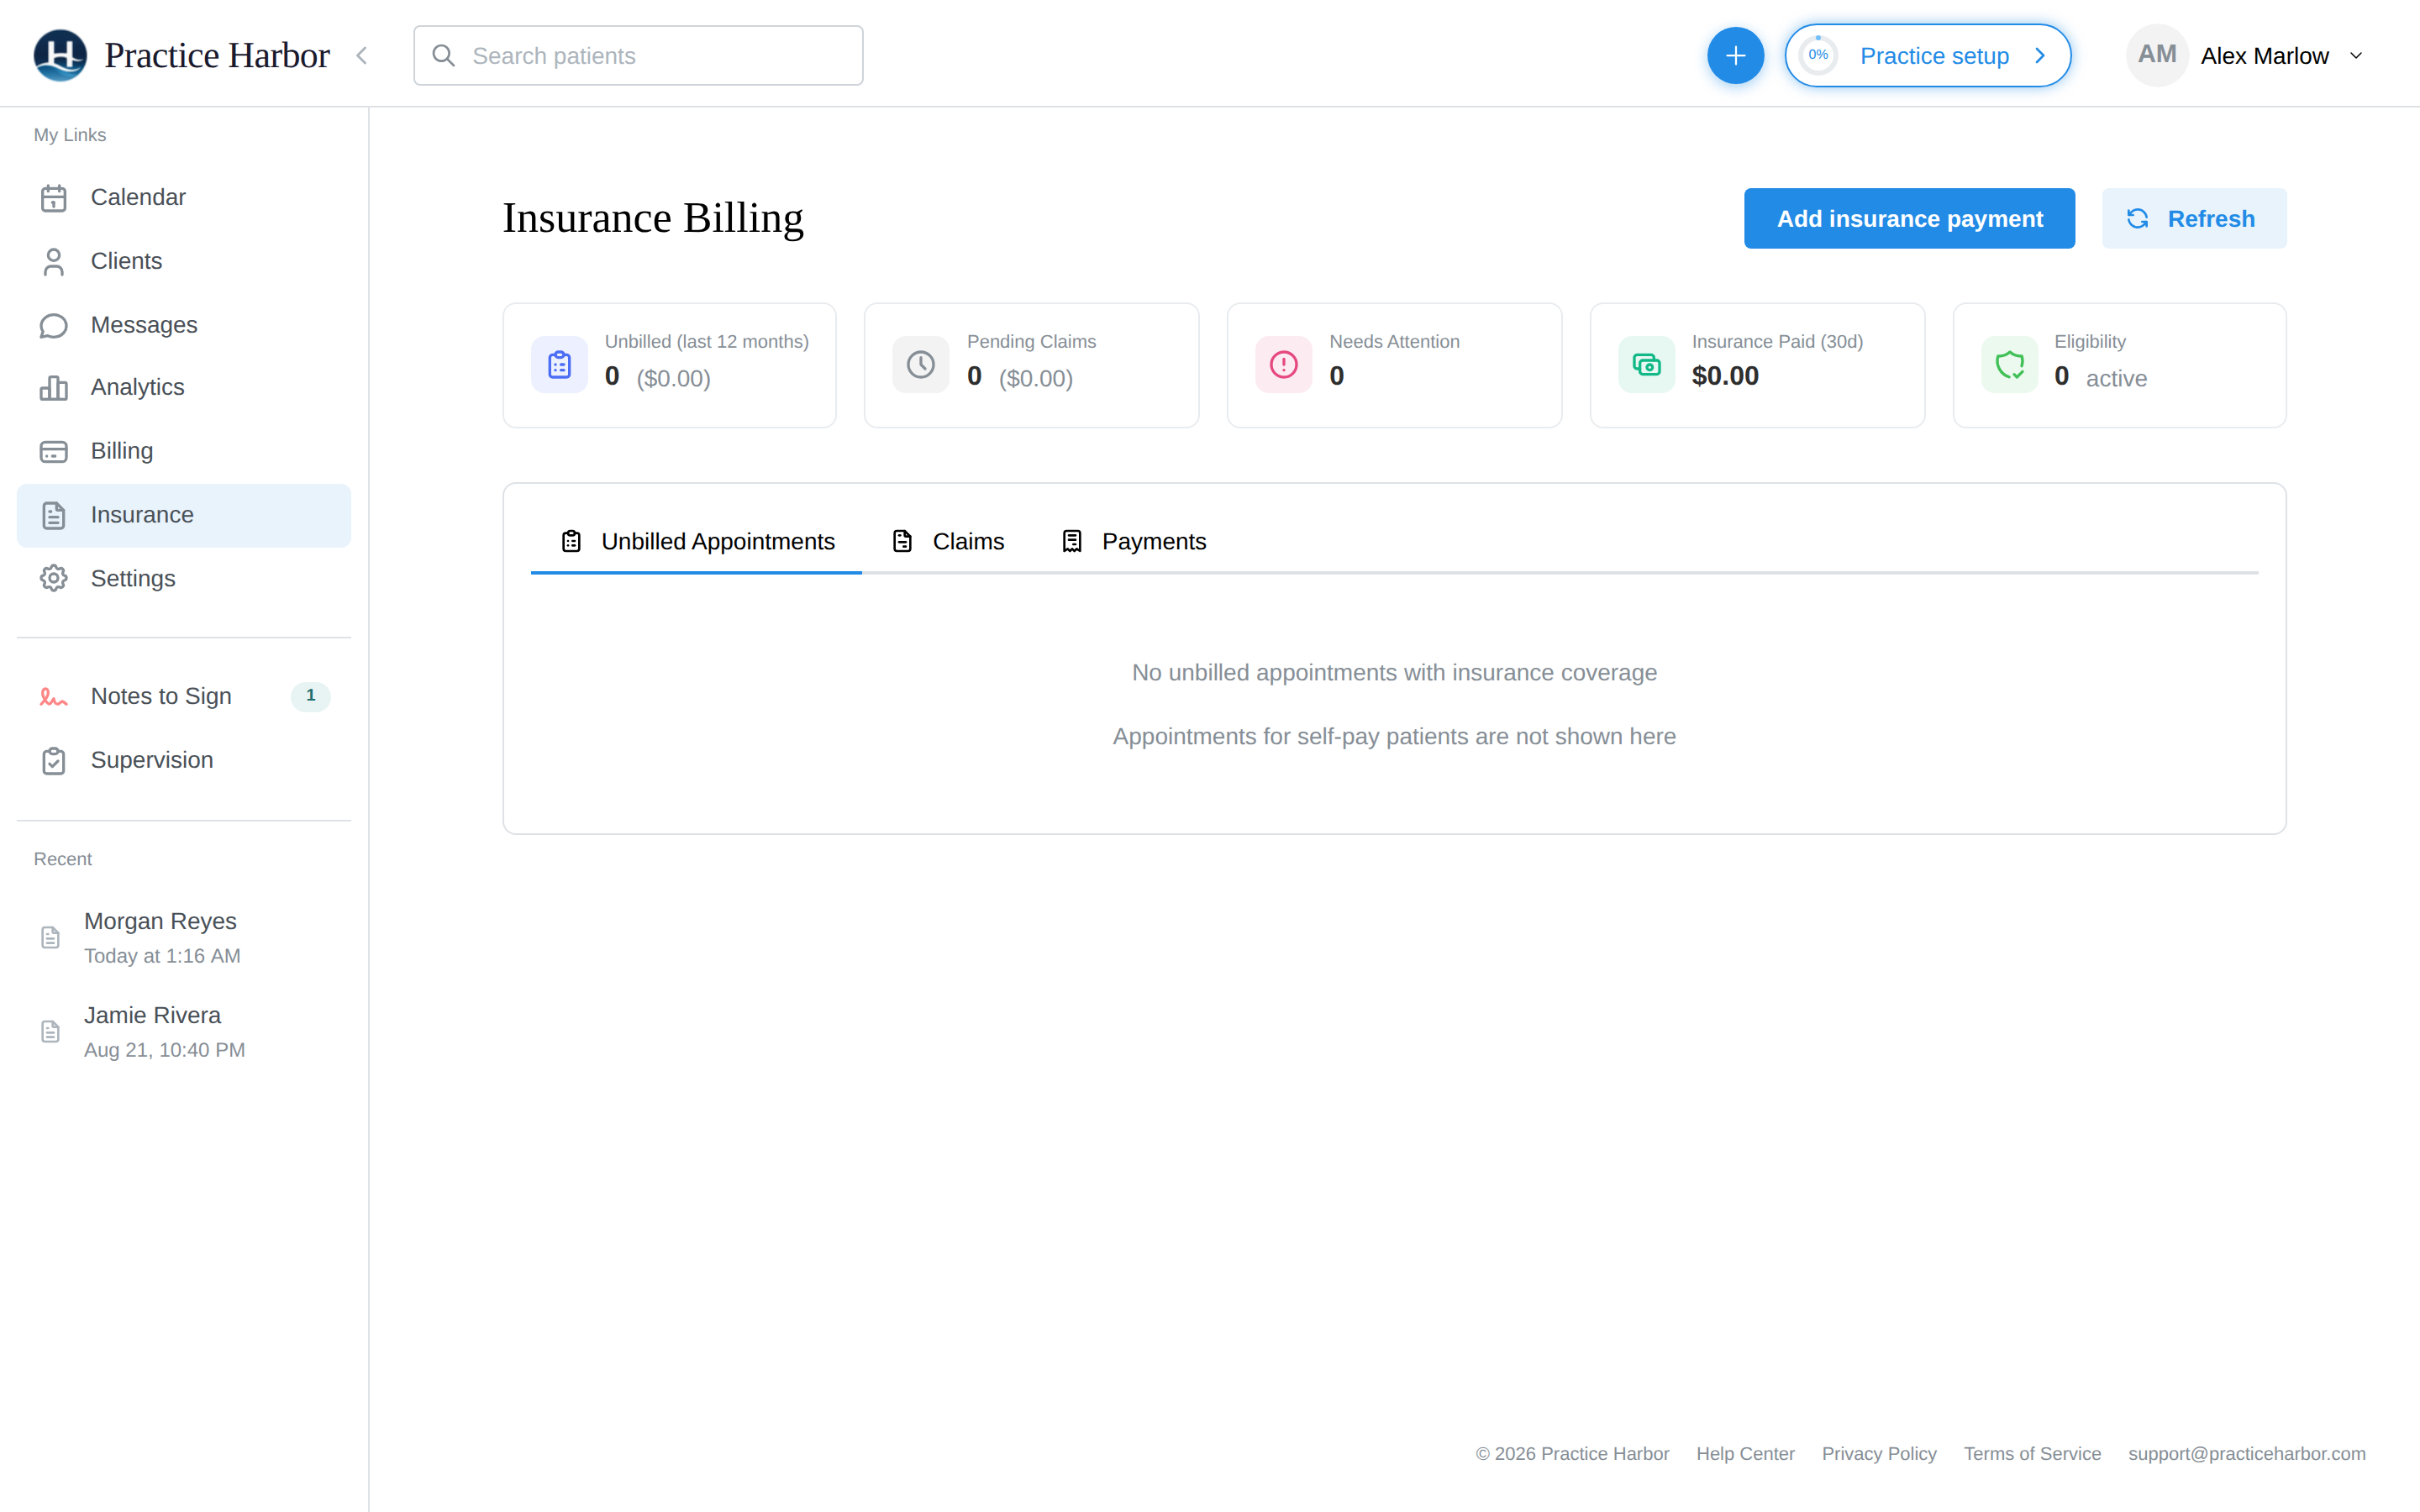
The summary cards give you the practice's insurance pulse at a glance: Unbilled appointments (last 12 months), Pending Claims, claims that Need Attention, Insurance Paid in the last 30 days, and active Eligibility checks.
Three tabs organize the work:
| Tab | What it's for |
|---|---|
| Unbilled Appointments | Insurance-billable appointments that don't have a claim yet — your filing to-do list. Self-pay appointments never appear here. |
| Claims | Every claim with its status (the full lifecycle), filterable by status |
| Payments | Insurance payments and ERAs, and posting them (details) |
The insurance workflow, end to end
- Set up once: enable insurance, complete your billing details, and enroll with your payers so ERAs flow back electronically
- Per client: add their coverage and set their billing type to Insurance
- Per session: hold the appointment and sign the note as usual — the appointment appears in Unbilled Appointments
- File: create and submit claims, individually or in batches
- Track: watch claim statuses; fix rejections and denials when they happen
- Get paid: ERAs and insurance payments post against your claims, and any client responsibility flows to client billing
Prefer to bill insurance outside the platform? You can print CMS-1500 forms and mark claims filed externally instead of submitting electronically.