Your practice website
Your practice can publish a simple, professional website at the same address clients already use for the portal — your practice pages and the Sign in / Request Appointment buttons, all in one place, with nothing to host anywhere else.
In this guide, we'll cover:
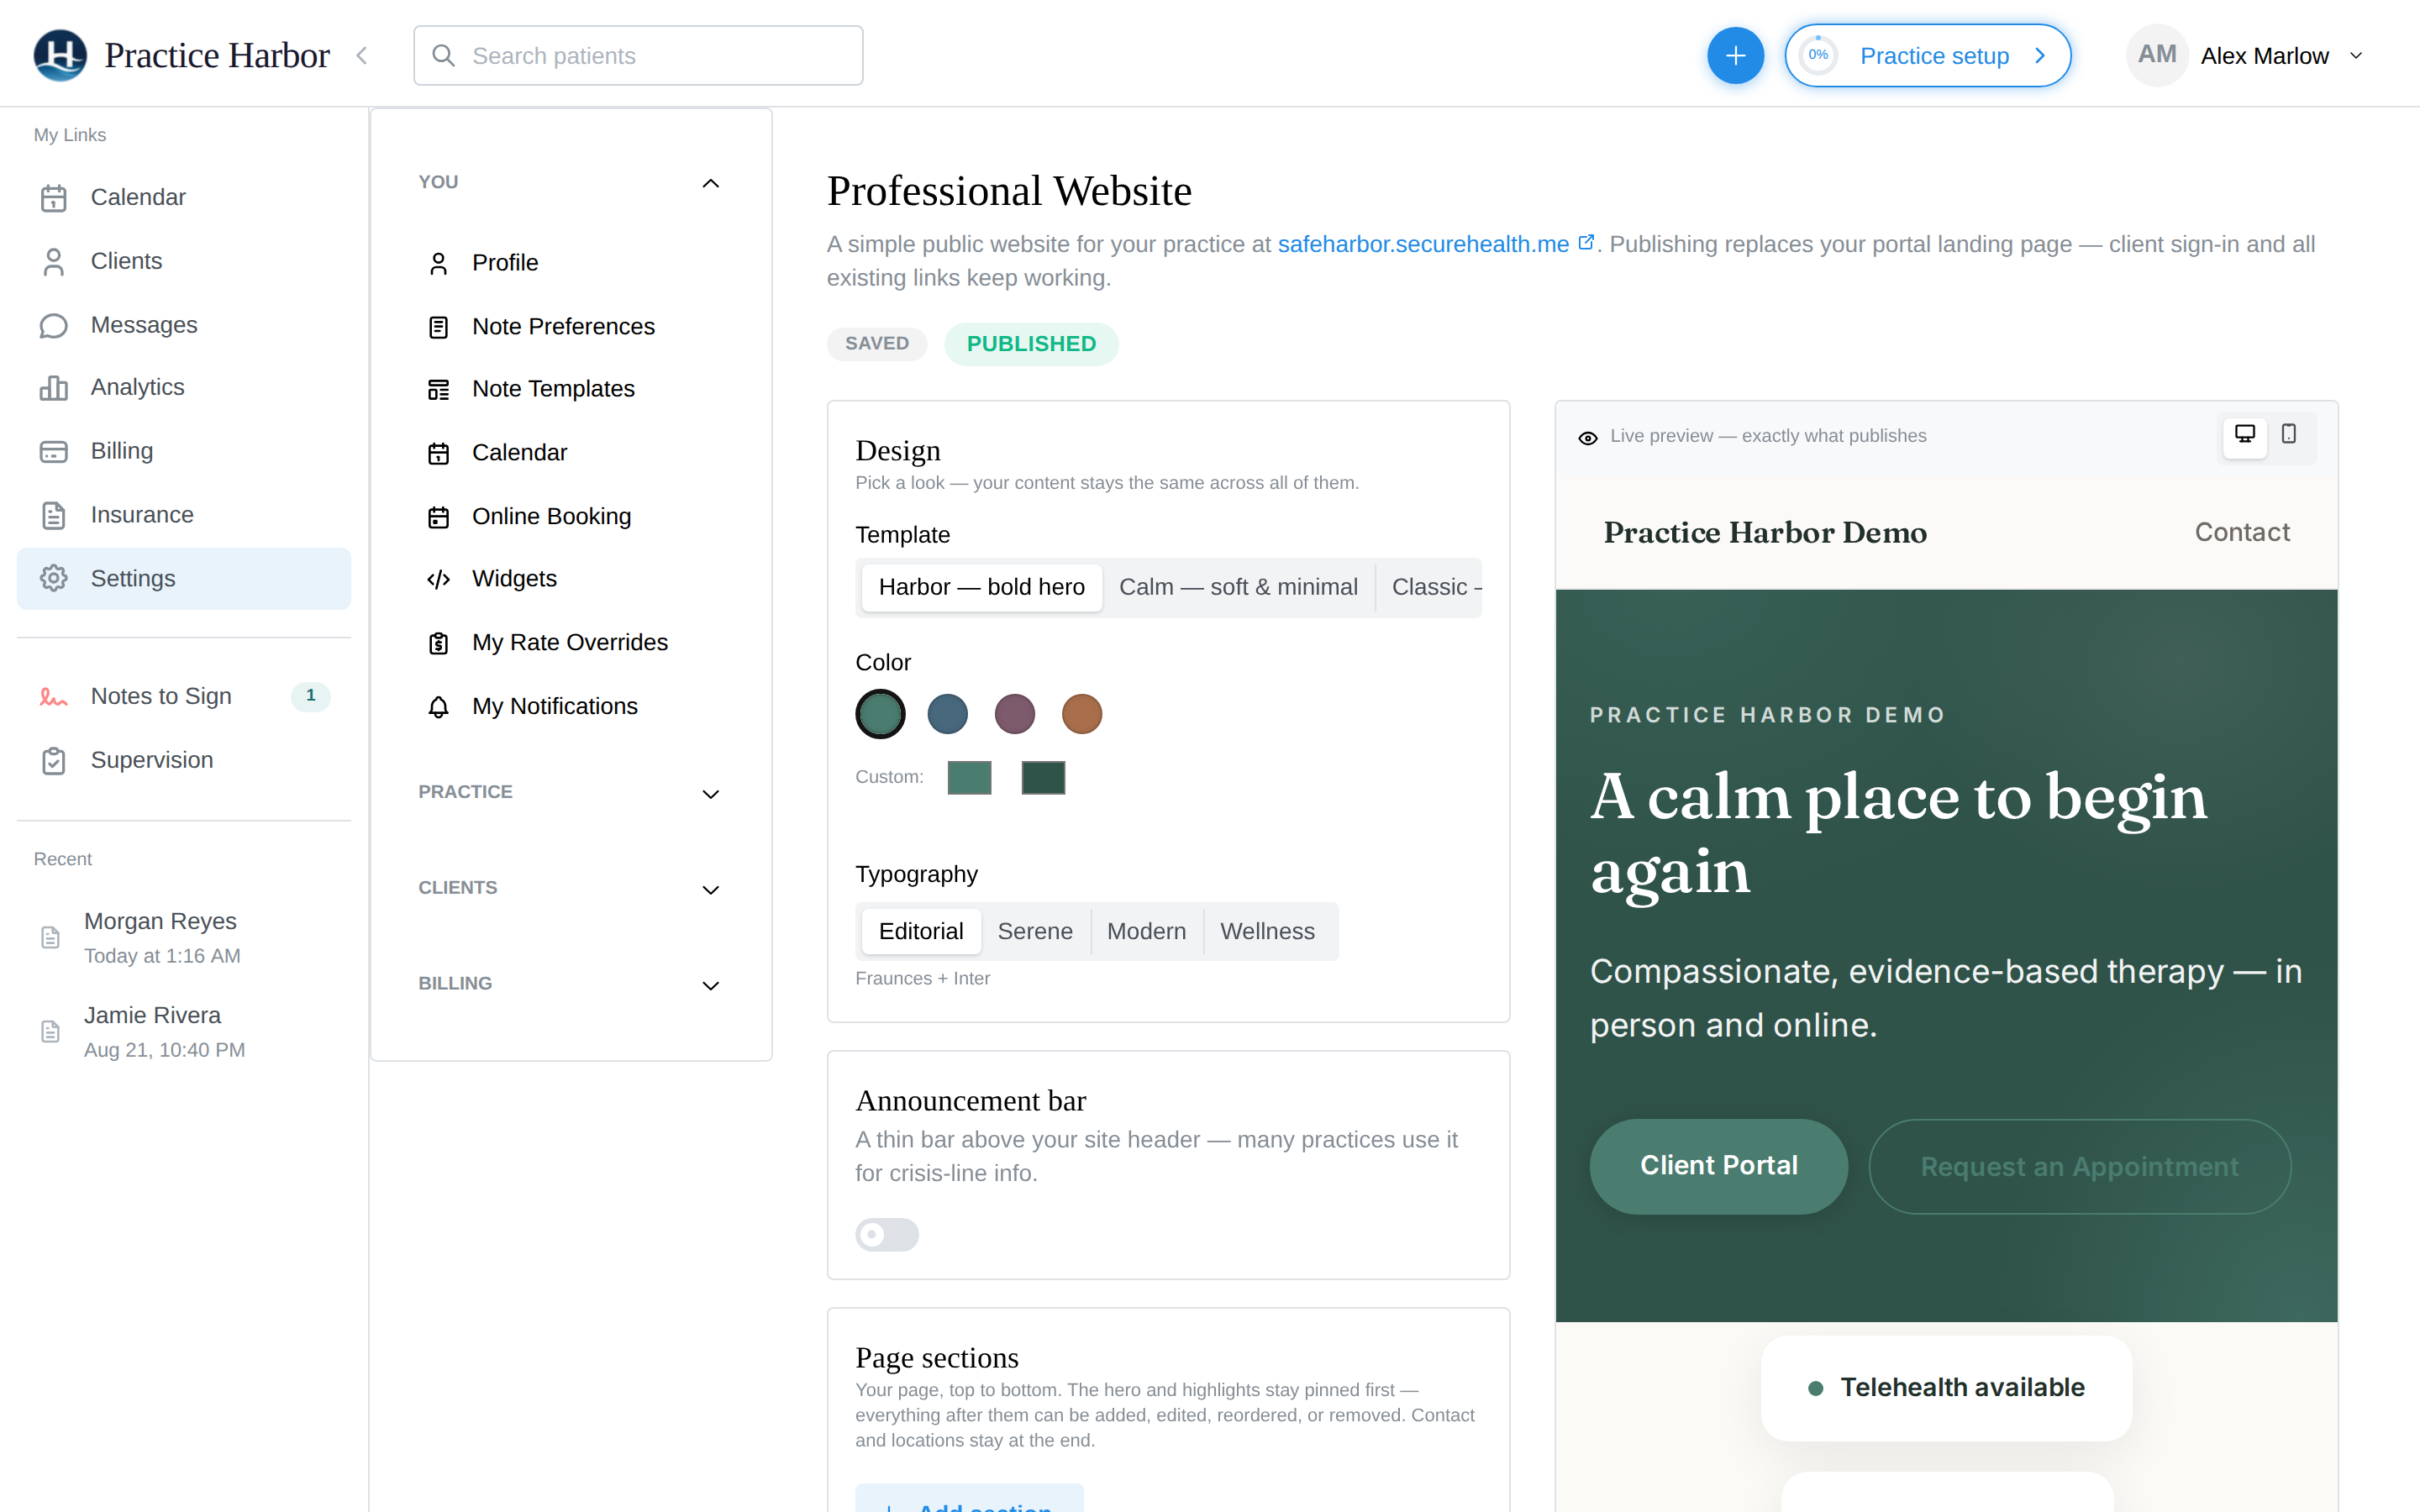
Building your site
- Go to Settings → Website.
- Work through the cards top to bottom — practice basics (with switches like Accepting new clients, Insurance accepted, Telehealth available, and Hide street address if you don't see clients at a public location), your About text, team bios (photo, name, pronouns, credentials, a short bio), and any extra sections.
- Click Save as you go. Saving stores your changes without publishing them — nothing is visible to clients until you publish.
Pages you add can appear in the site's top menu (Show in top menu), and every section has a Show section switch, so you can draft something and keep it hidden until it's ready.
The sections you can add
Mix and match building blocks on any page:
- Text and Image blocks (an image with an overlay heading becomes a banner), and a Video block that embeds a YouTube or Vimeo link.
- FAQ — question-and-answer pairs, great for fees/insurance/first-visit questions.
- Fees — your services and rates, if you choose to list them.
- Quote — a highlighted passage with attribution.
- Chips — a tag row (specialties, populations served, modalities).
- Call to action — a labeled button linking wherever you point it.
- Social links and a Testimonials block.
Reorder blocks with the Move up / Move down arrows; Duplicate copies a block you want to reuse.
Most behavioral-health ethics codes (including APA 5.05) prohibit soliciting testimonials from current clients. If you use the Testimonials block, stick to content you may ethically display under your license's rules — many practices use it for colleague endorsements or non-clinical praise instead.
Previewing and publishing
- Click Preview to see the site exactly as a visitor would, before anything goes live.
- Click Publish. Your site goes live at your practice address — the same
your-practice.securehealth.meaddress as your client portal, with portal sign-in reachable from the site's Client Portal button. - To take it down, Unpublish — the plain portal landing page returns, and all your website content stays saved for later.
Two guard rails worth knowing:
- Publishing requires your practice's portal address (slug) to be set up first — that's the same setting that powers portal invitations (see Client portal).
- If your About section still contains the sample placeholder text, publishing asks you to confirm — so a half-finished draft doesn't slip out with lorem-ipsum prose.
FAQ
Does publishing change anything for clients who already use the portal? No — signing in works exactly as before. The website simply becomes what visitors see before they sign in, with the Client Portal button taking clients to their usual sign-in.
Can prospective clients book from the site? Yes — show the Request Appointment button and it drives your online booking flow, subject to the same availability and new-client settings.
Can I use my own domain?
The site publishes at your securehealth.me practice address. If you own a domain, most
registrars let you forward it to that address.
Do I need to keep a separate website? Only if you want one. Many solo practices find this covers everything a first-visit visitor needs: who you are, what you treat, fees, and the two buttons that matter — book and sign in.